Prerequisites
Before you begin, ensure you have:- A verified X (Twitter) account.
- Admin access to your PaddyPost workspace.
Step 1: Create a Developer Account
Sign Up
Go to console.x.com and sign up for an account using your existing X (Twitter) account.
Click Start Building
On the Developer Console page, click the Start Building button to begin setting up your developer access.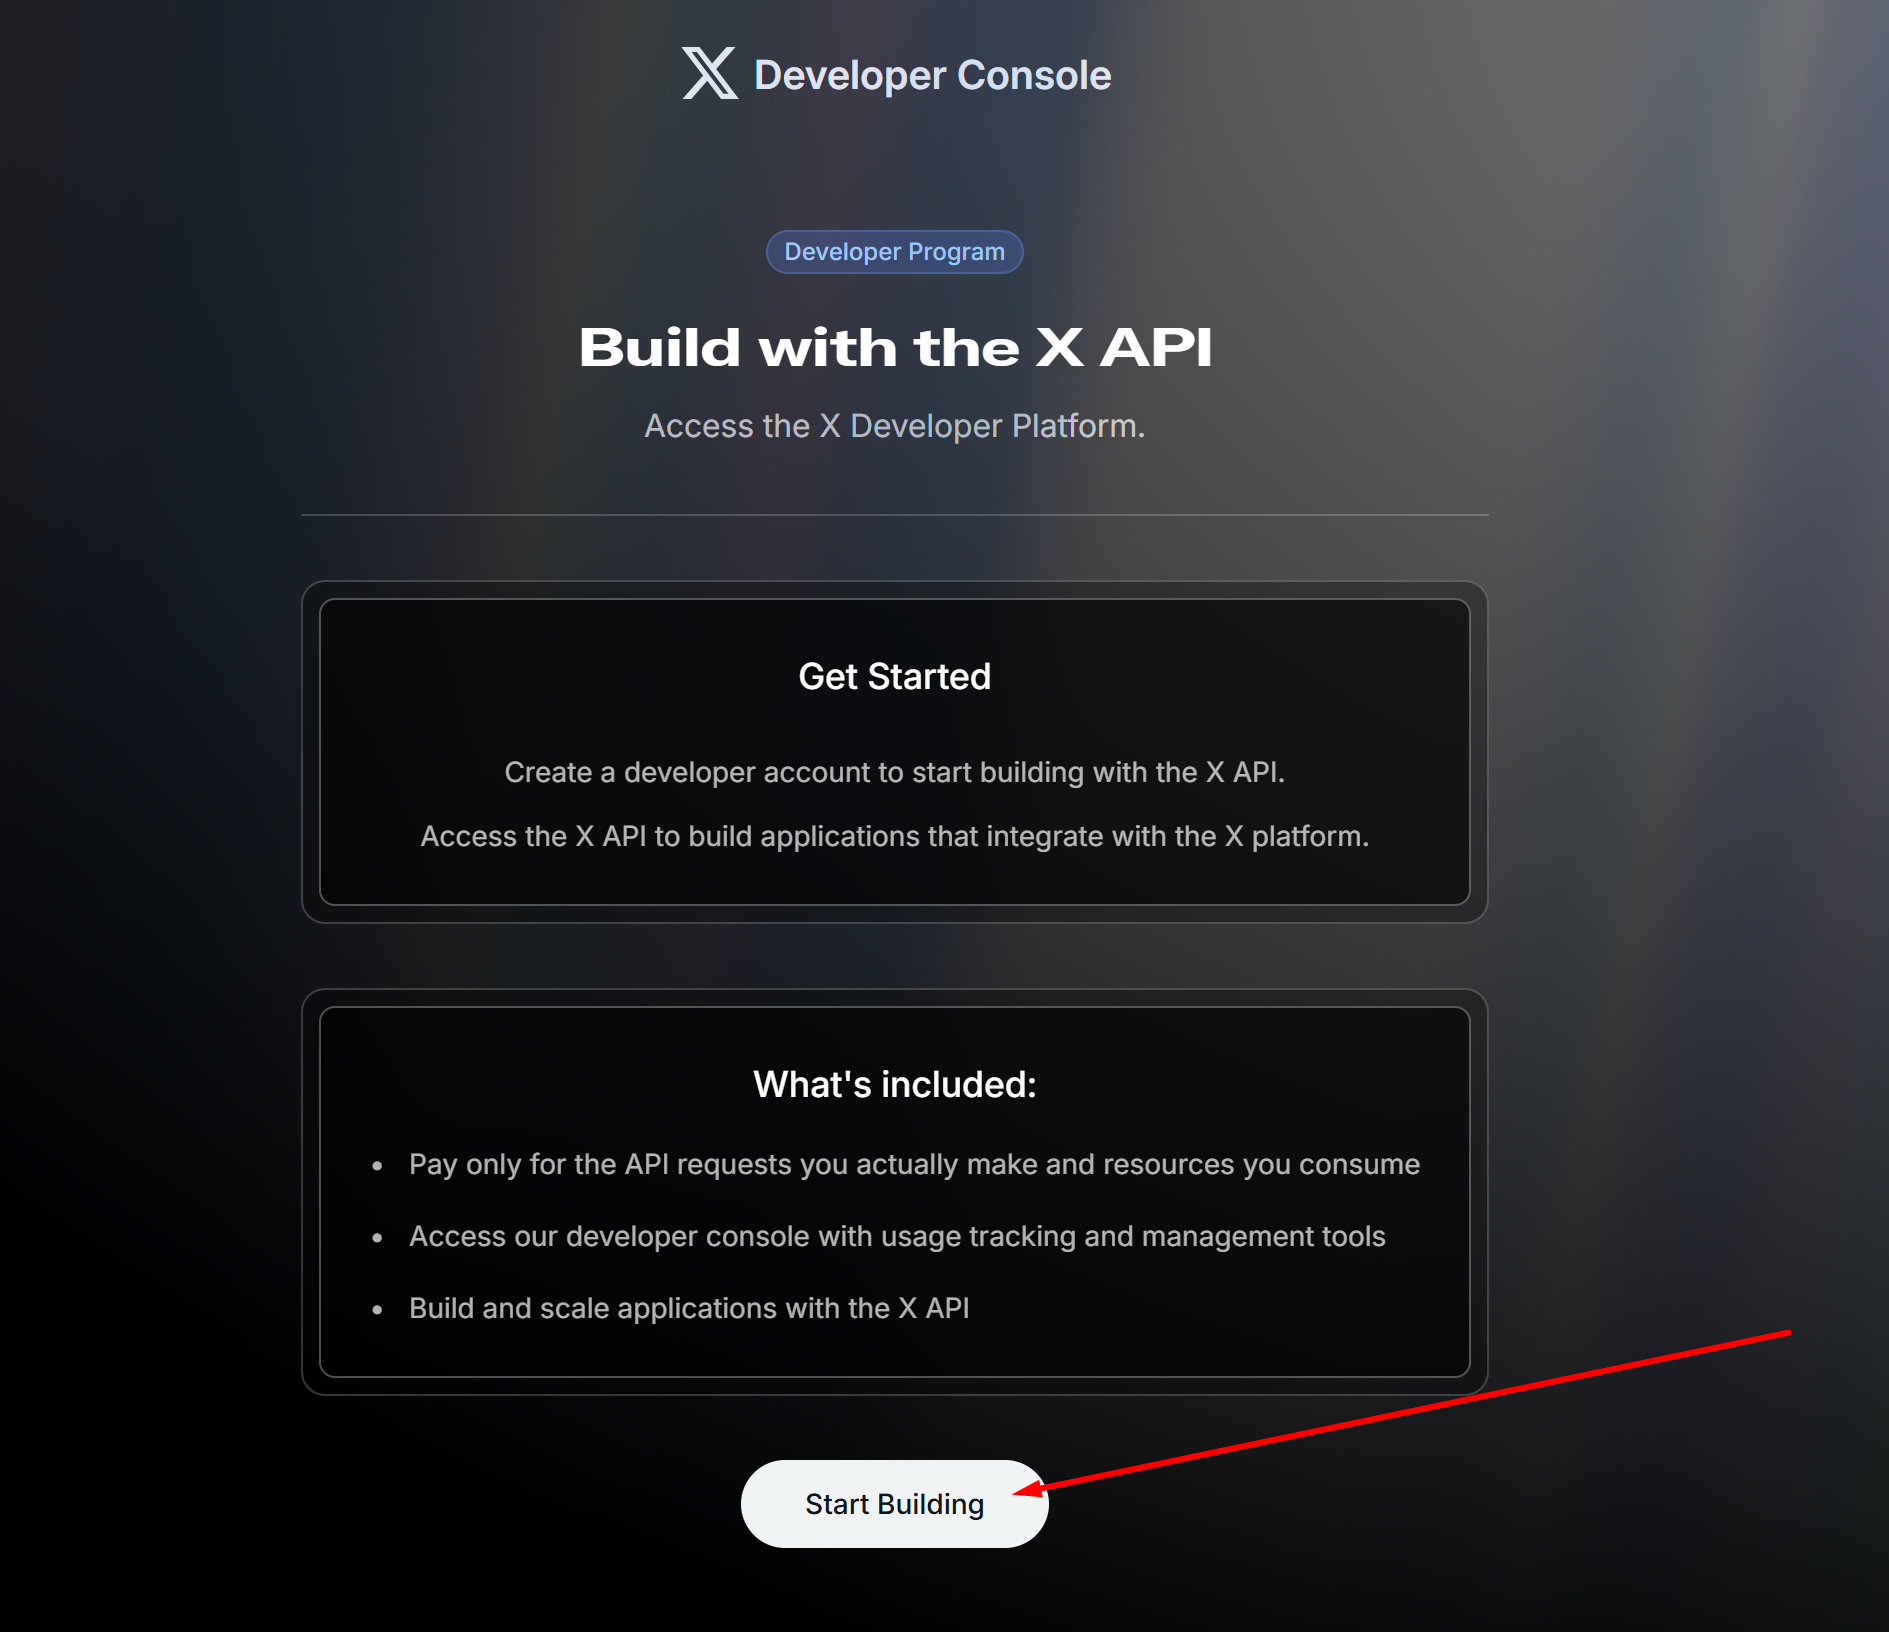
Create Your First Project
You will be prompted to create your first Project. Fill in the following details: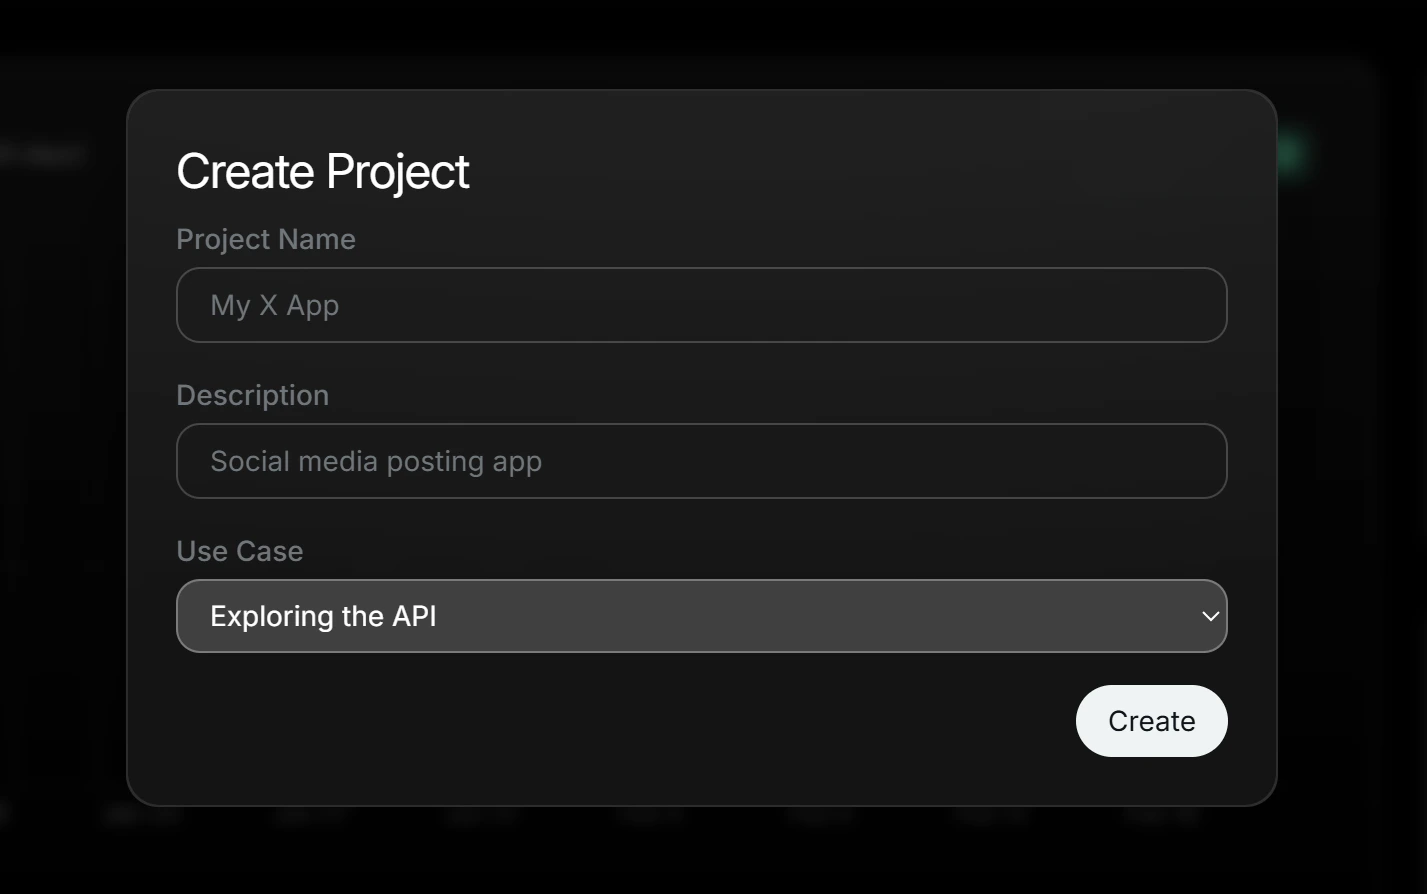
- Project Name: Give it a name like “PaddyPost” or “My Scheduler”.
- Description: Enter a short description (e.g., “Social media posting app”).
- Use Case: Select Exploring the API from the dropdown.
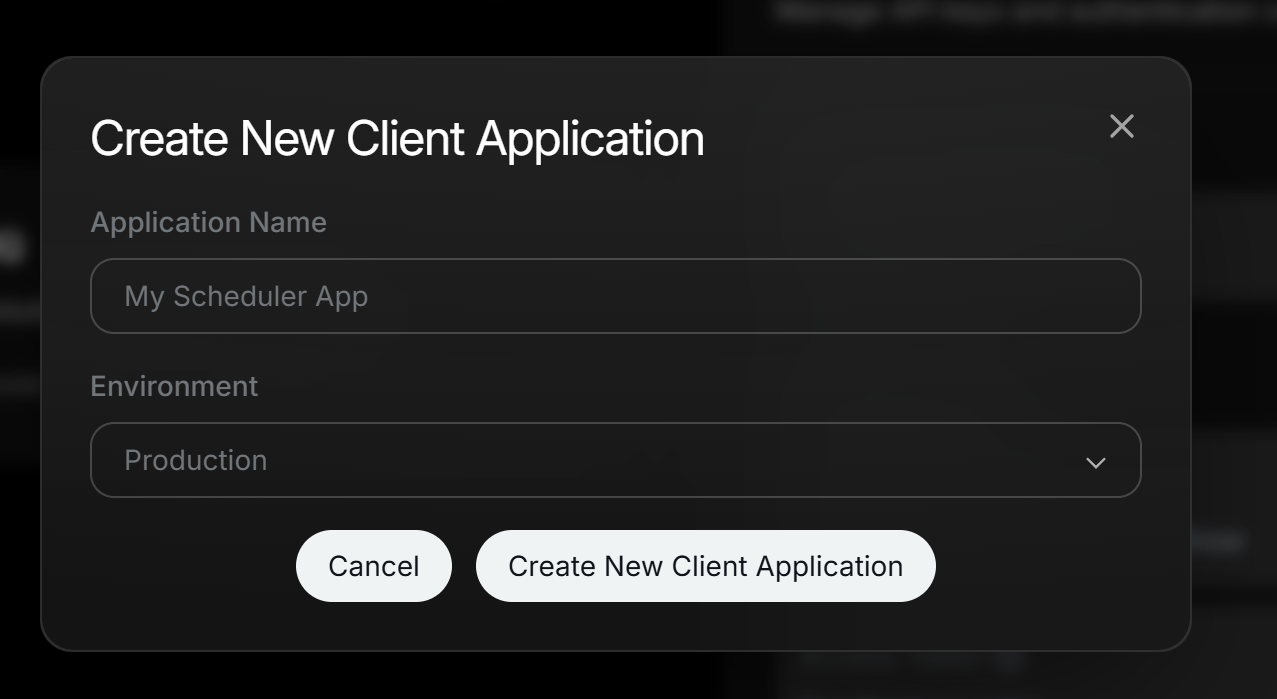
Step 2: Create an App
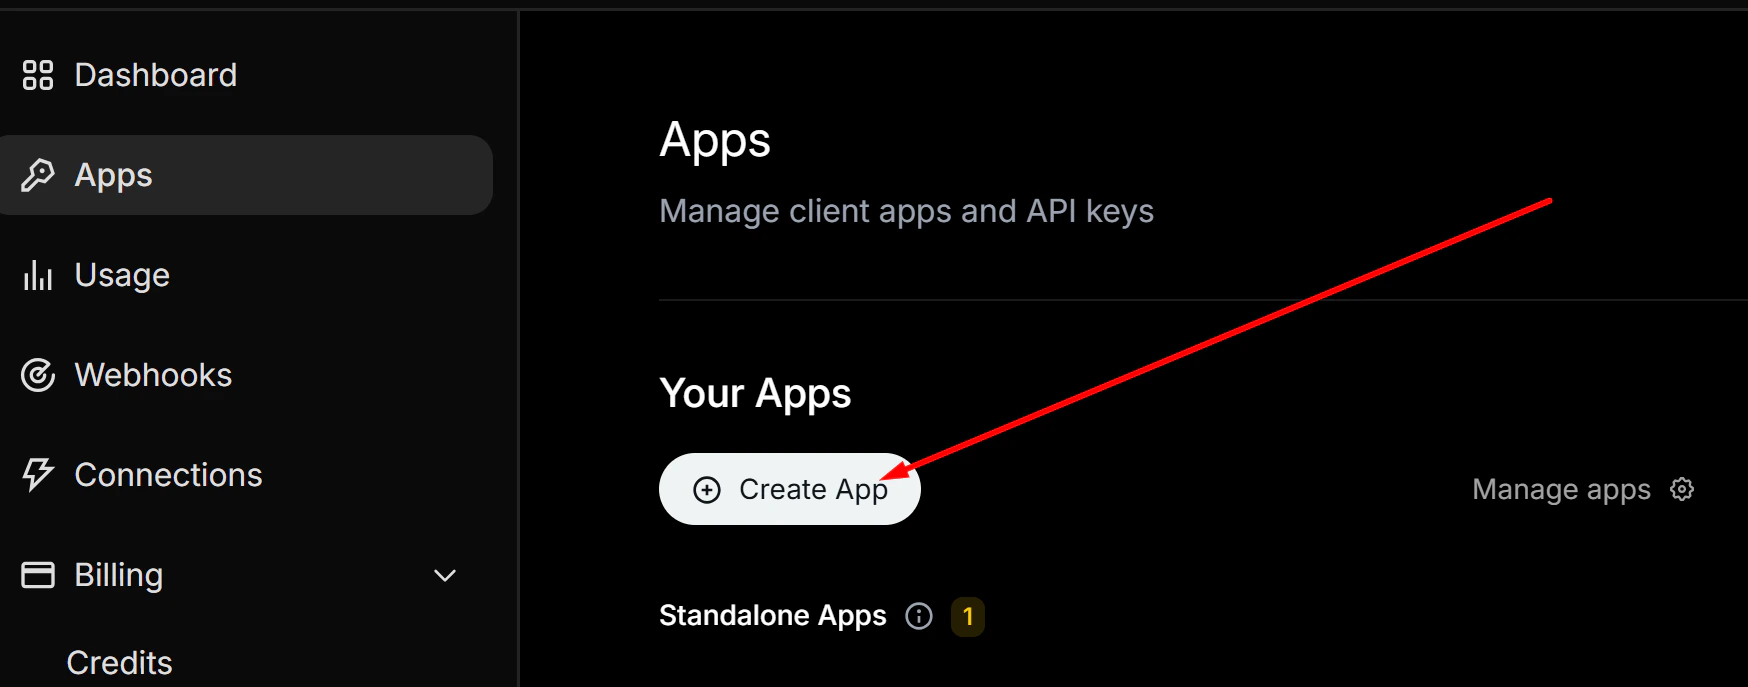
Configure and Create
- Application Name: Choose a unique name (e.g., “My Scheduler App”).
- Environment: Set this to Production.
Step 3: Set Up User Authentication
Open Your App
Click on your newly created App. Under User authentication settings, click the Set up button.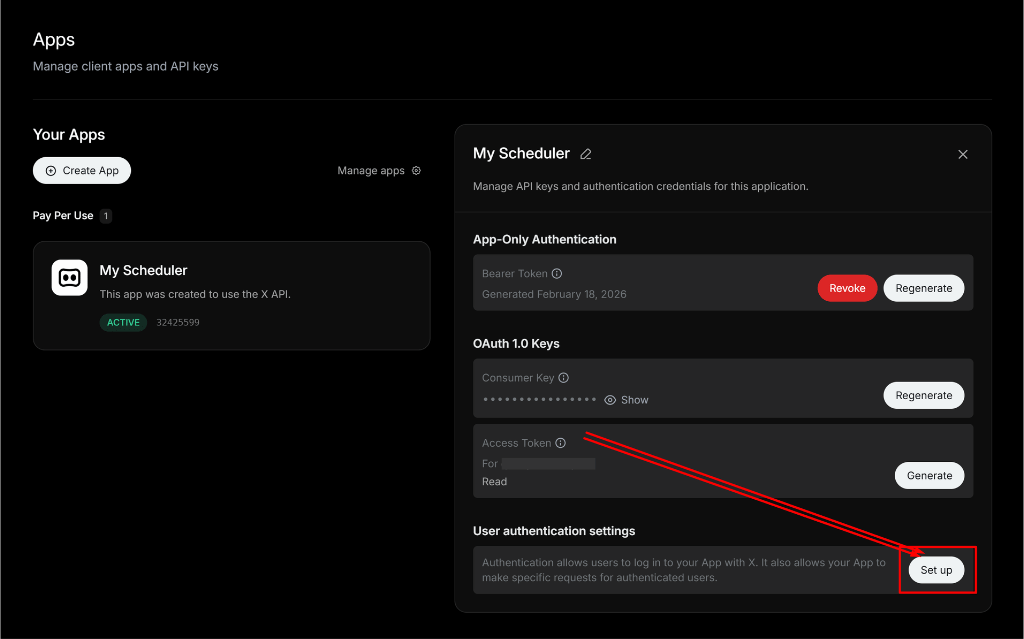
Enter Callback and Website URLs
Under App info, enter the following: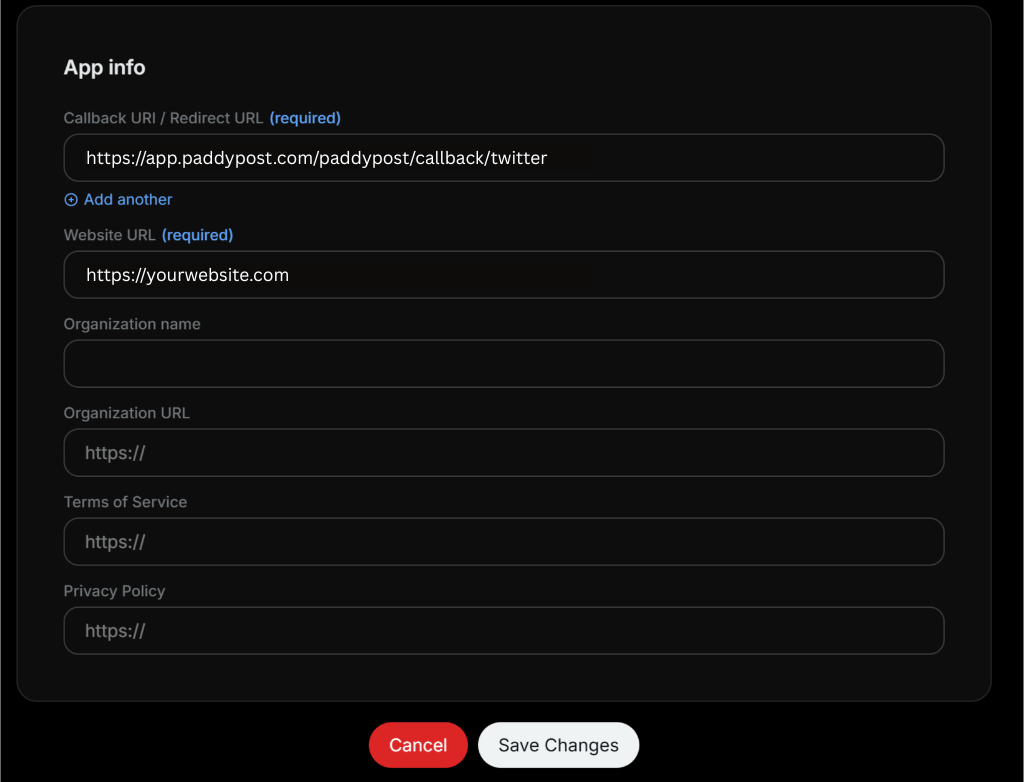
- Callback URI / Redirect URL:
- Website URL: Enter your main website URL (e.g.,
https://your-company.com).
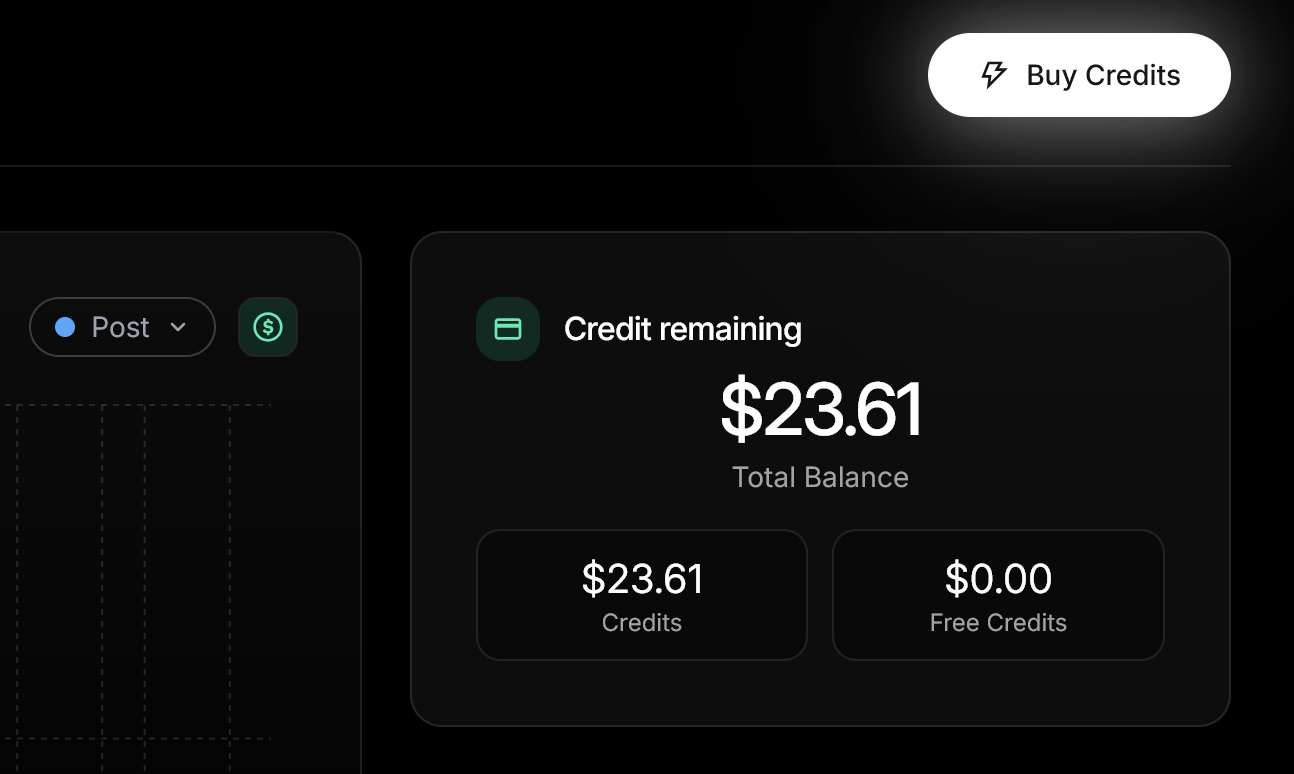
Step 4: Add Credits to Your X Developer Account
X requires you to add credits to your developer account before you can make API calls.Go to Buy Credits
On your X Developer Console dashboard, click the Buy Credits button in the top right.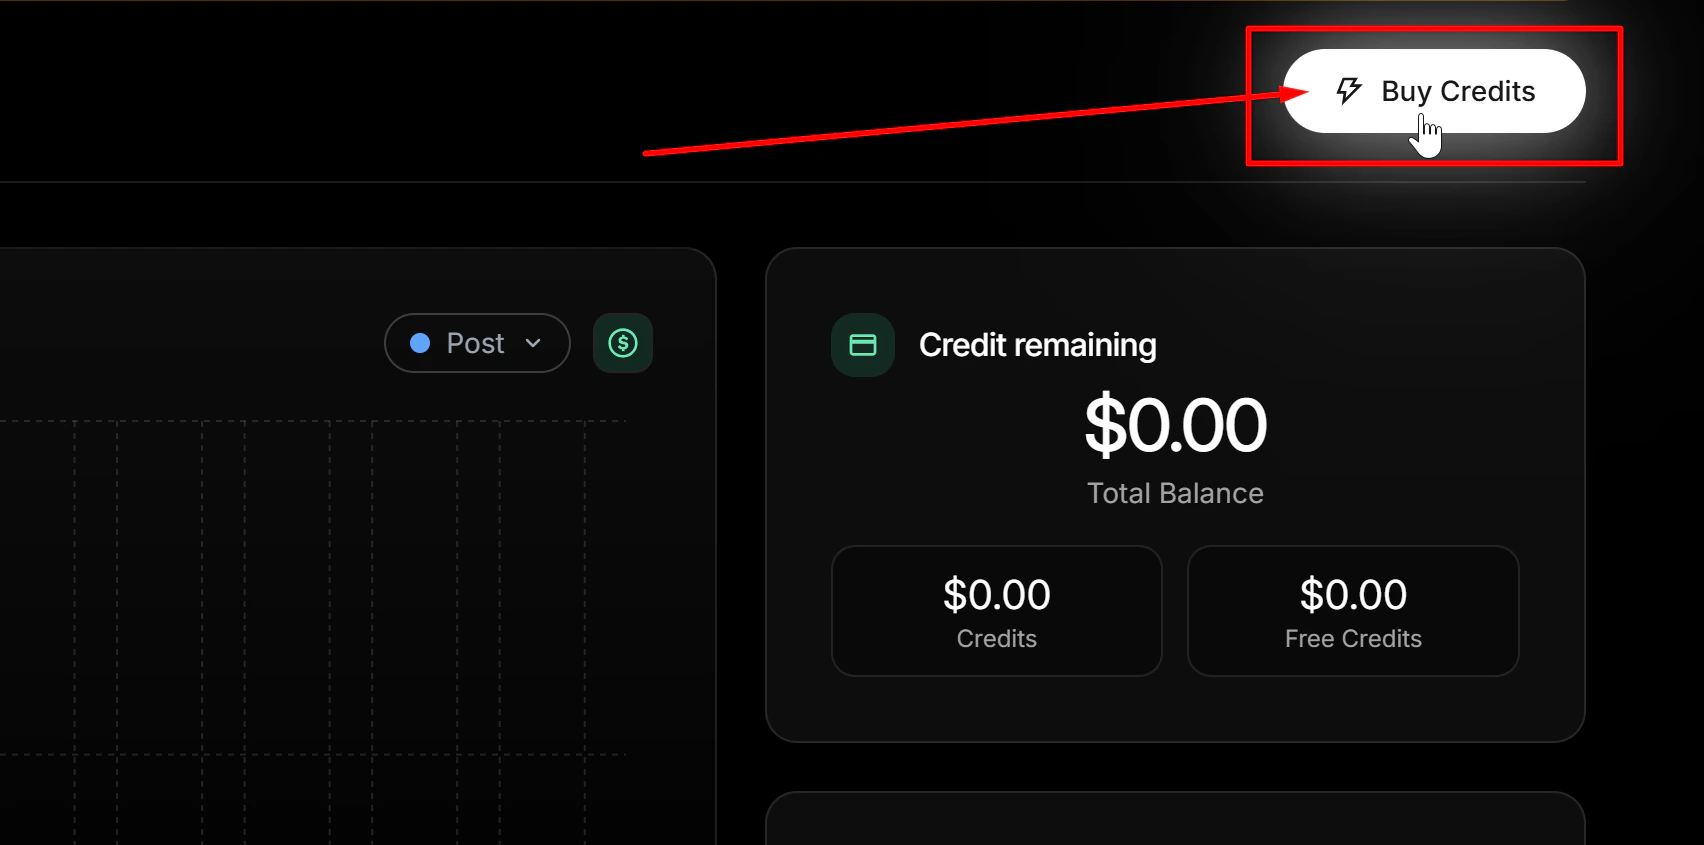
Purchase Credits
Select the amount you want to add. We recommend at least $5, which gives you approximately 500 posts.Click Continue to payment and complete the purchase.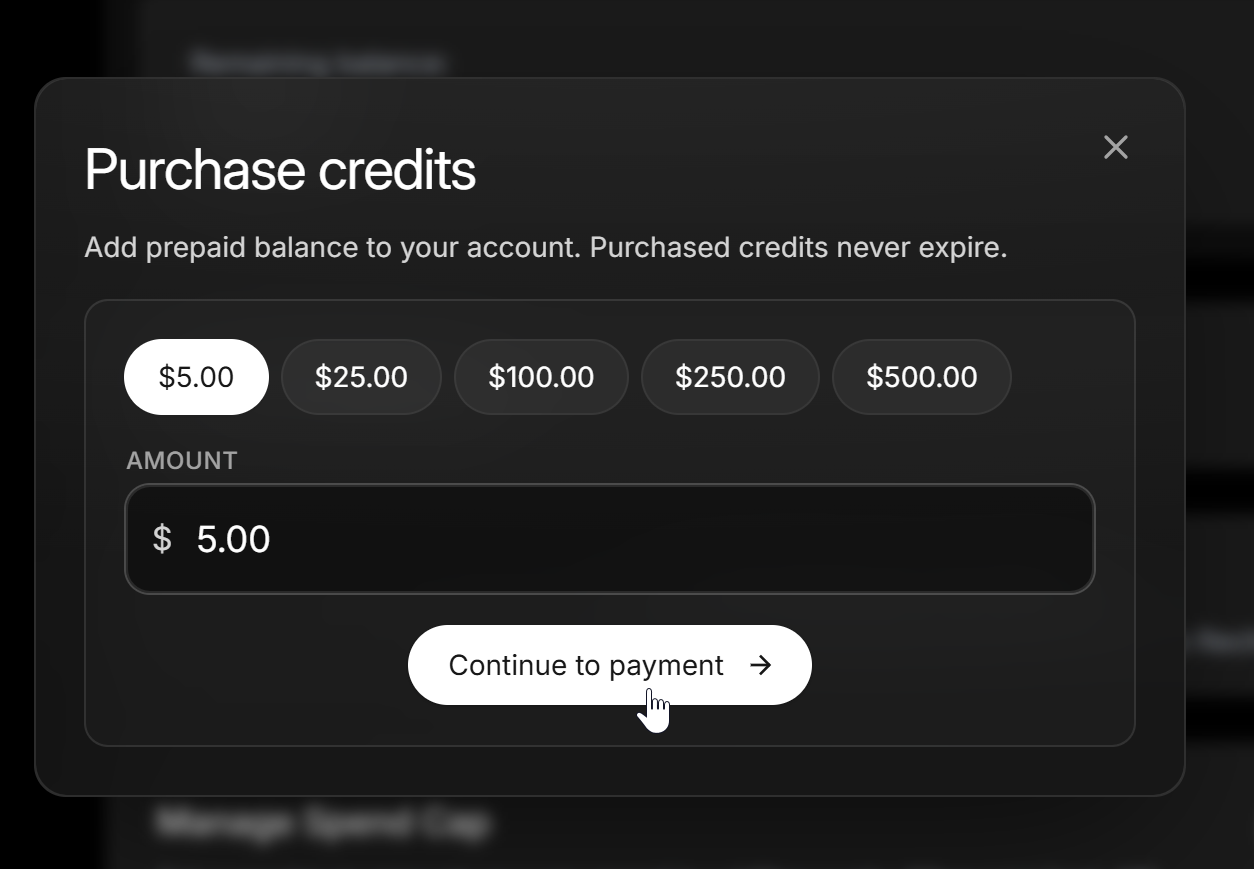
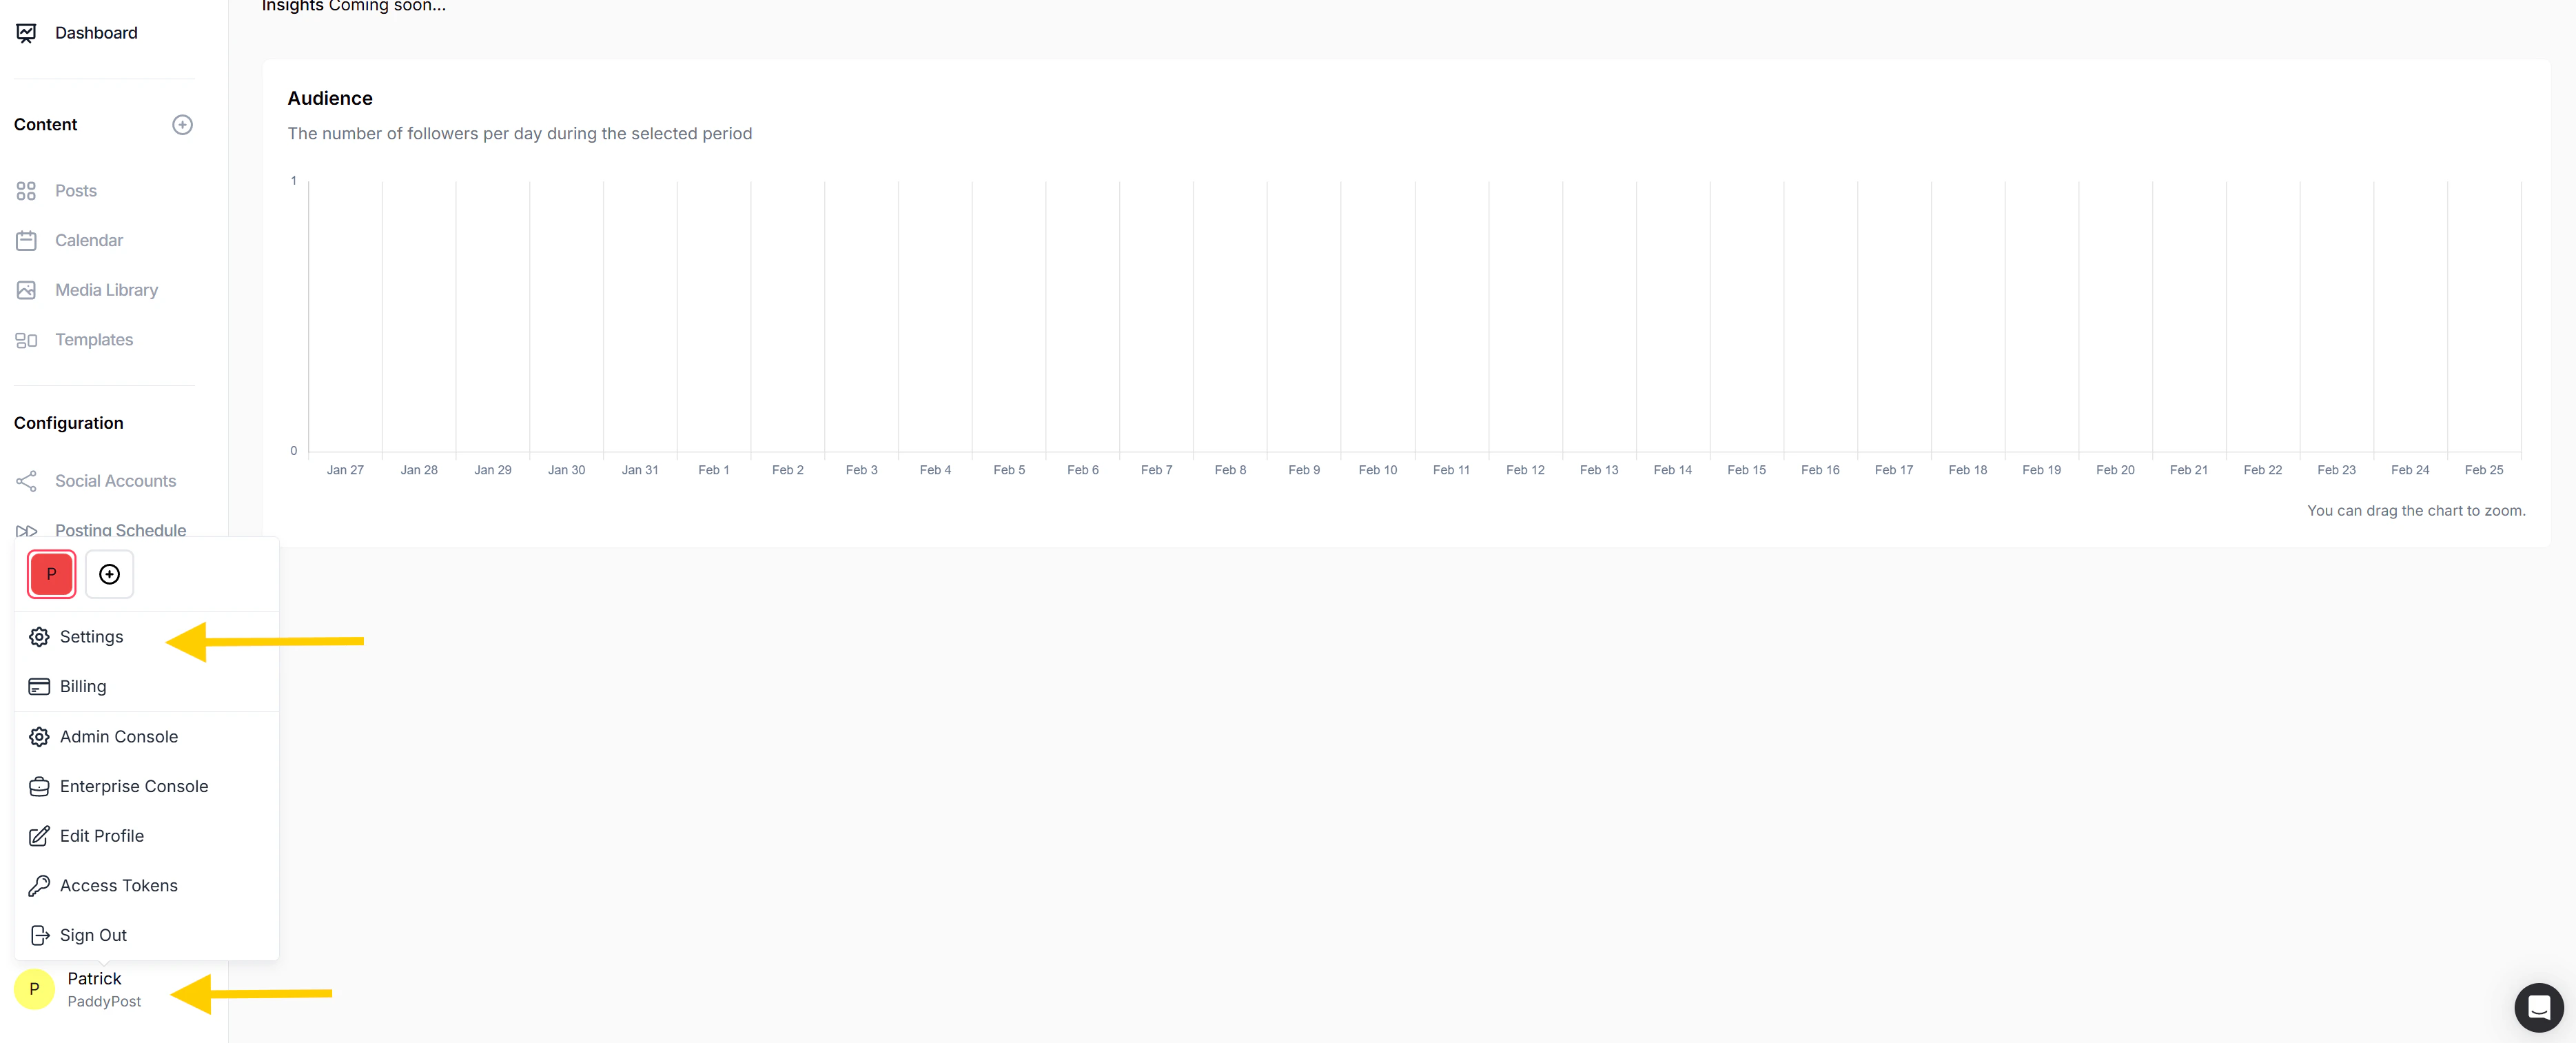
Step 5: Configure PaddyPost
Step 6: Connect Your Account
Troubleshooting
Unable to connect after entering keys
Unable to connect after entering keys
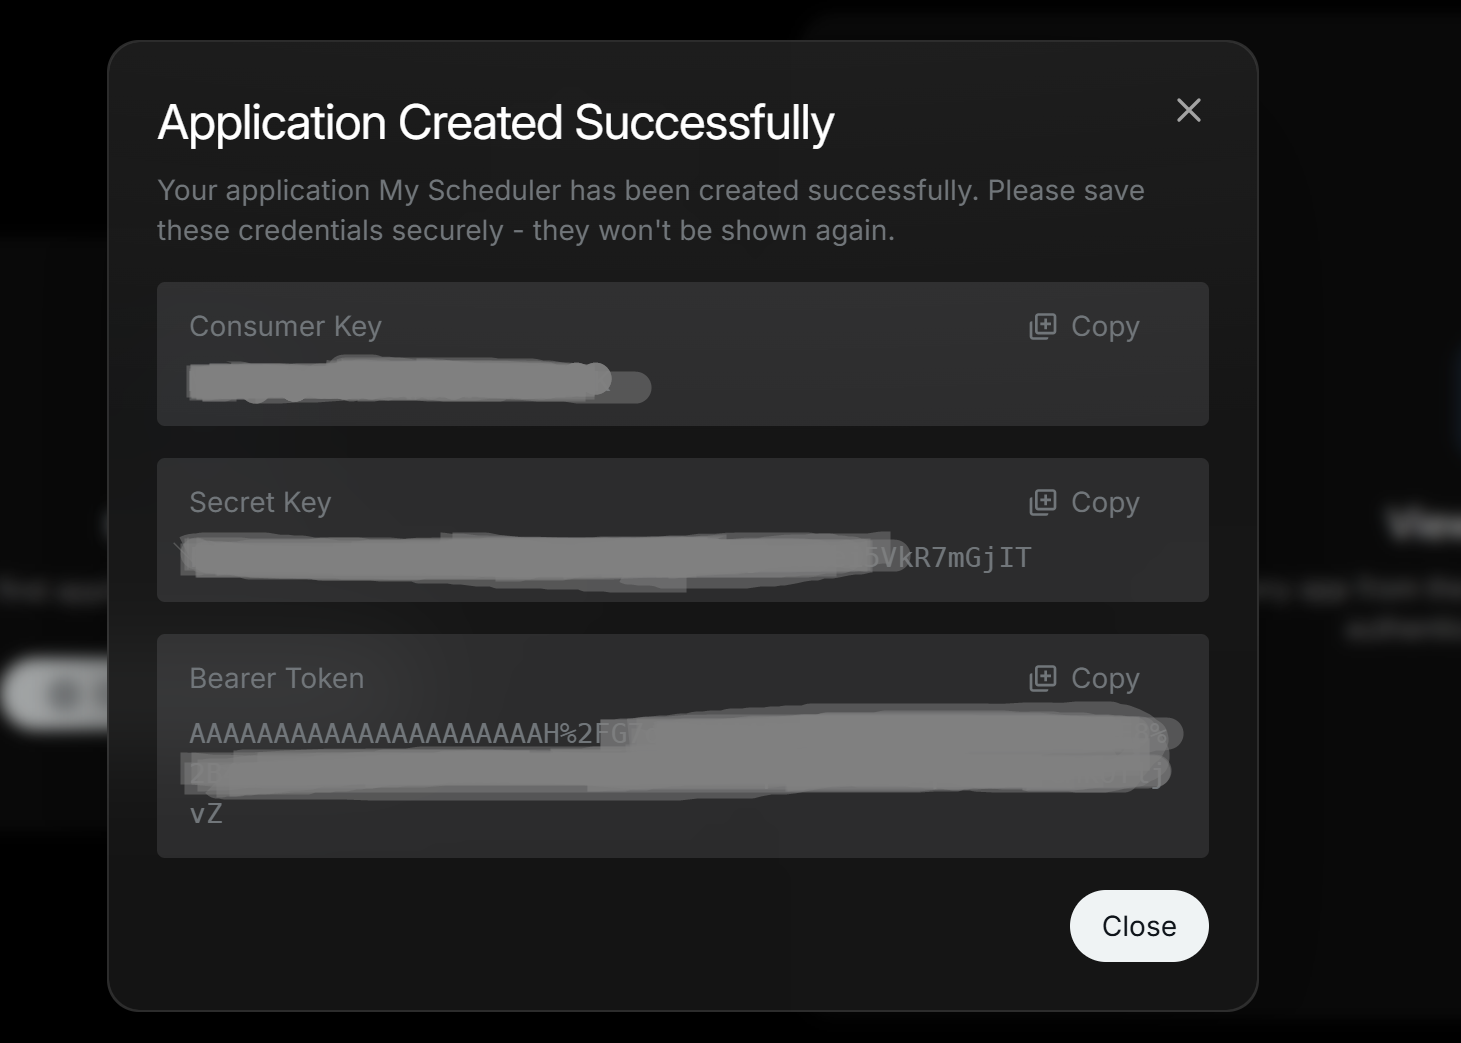
The most common issue is pasting the wrong keys. Make sure you are using the Consumer Key and Secret Key (OAuth 1.0 keys), not the OAuth 2.0 Client ID and Secret.To fix this: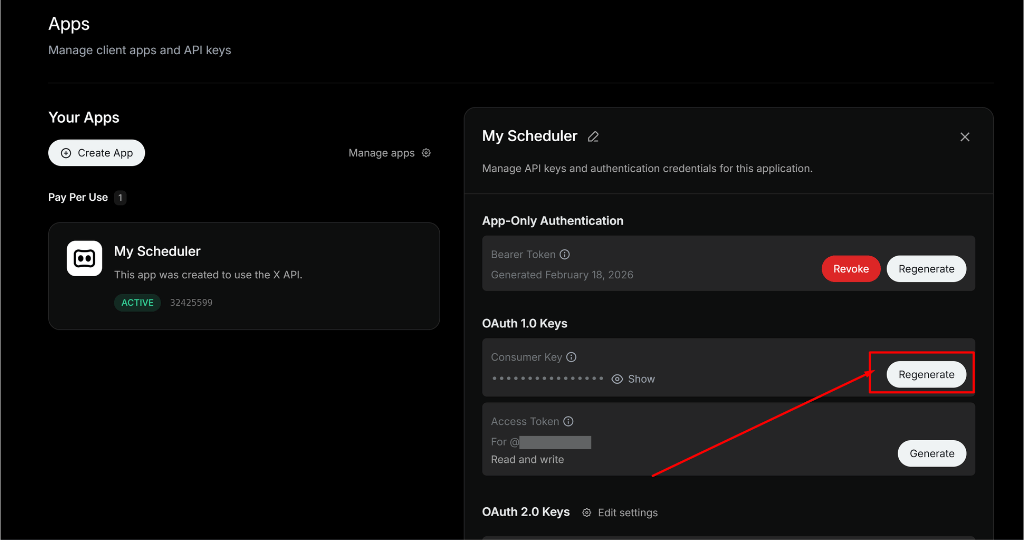
- Go to console.x.com.
- Click Apps in the sidebar and select your app.
- Under OAuth 1.0 Keys, click Regenerate.
- Copy the new Consumer Key and Secret Key.
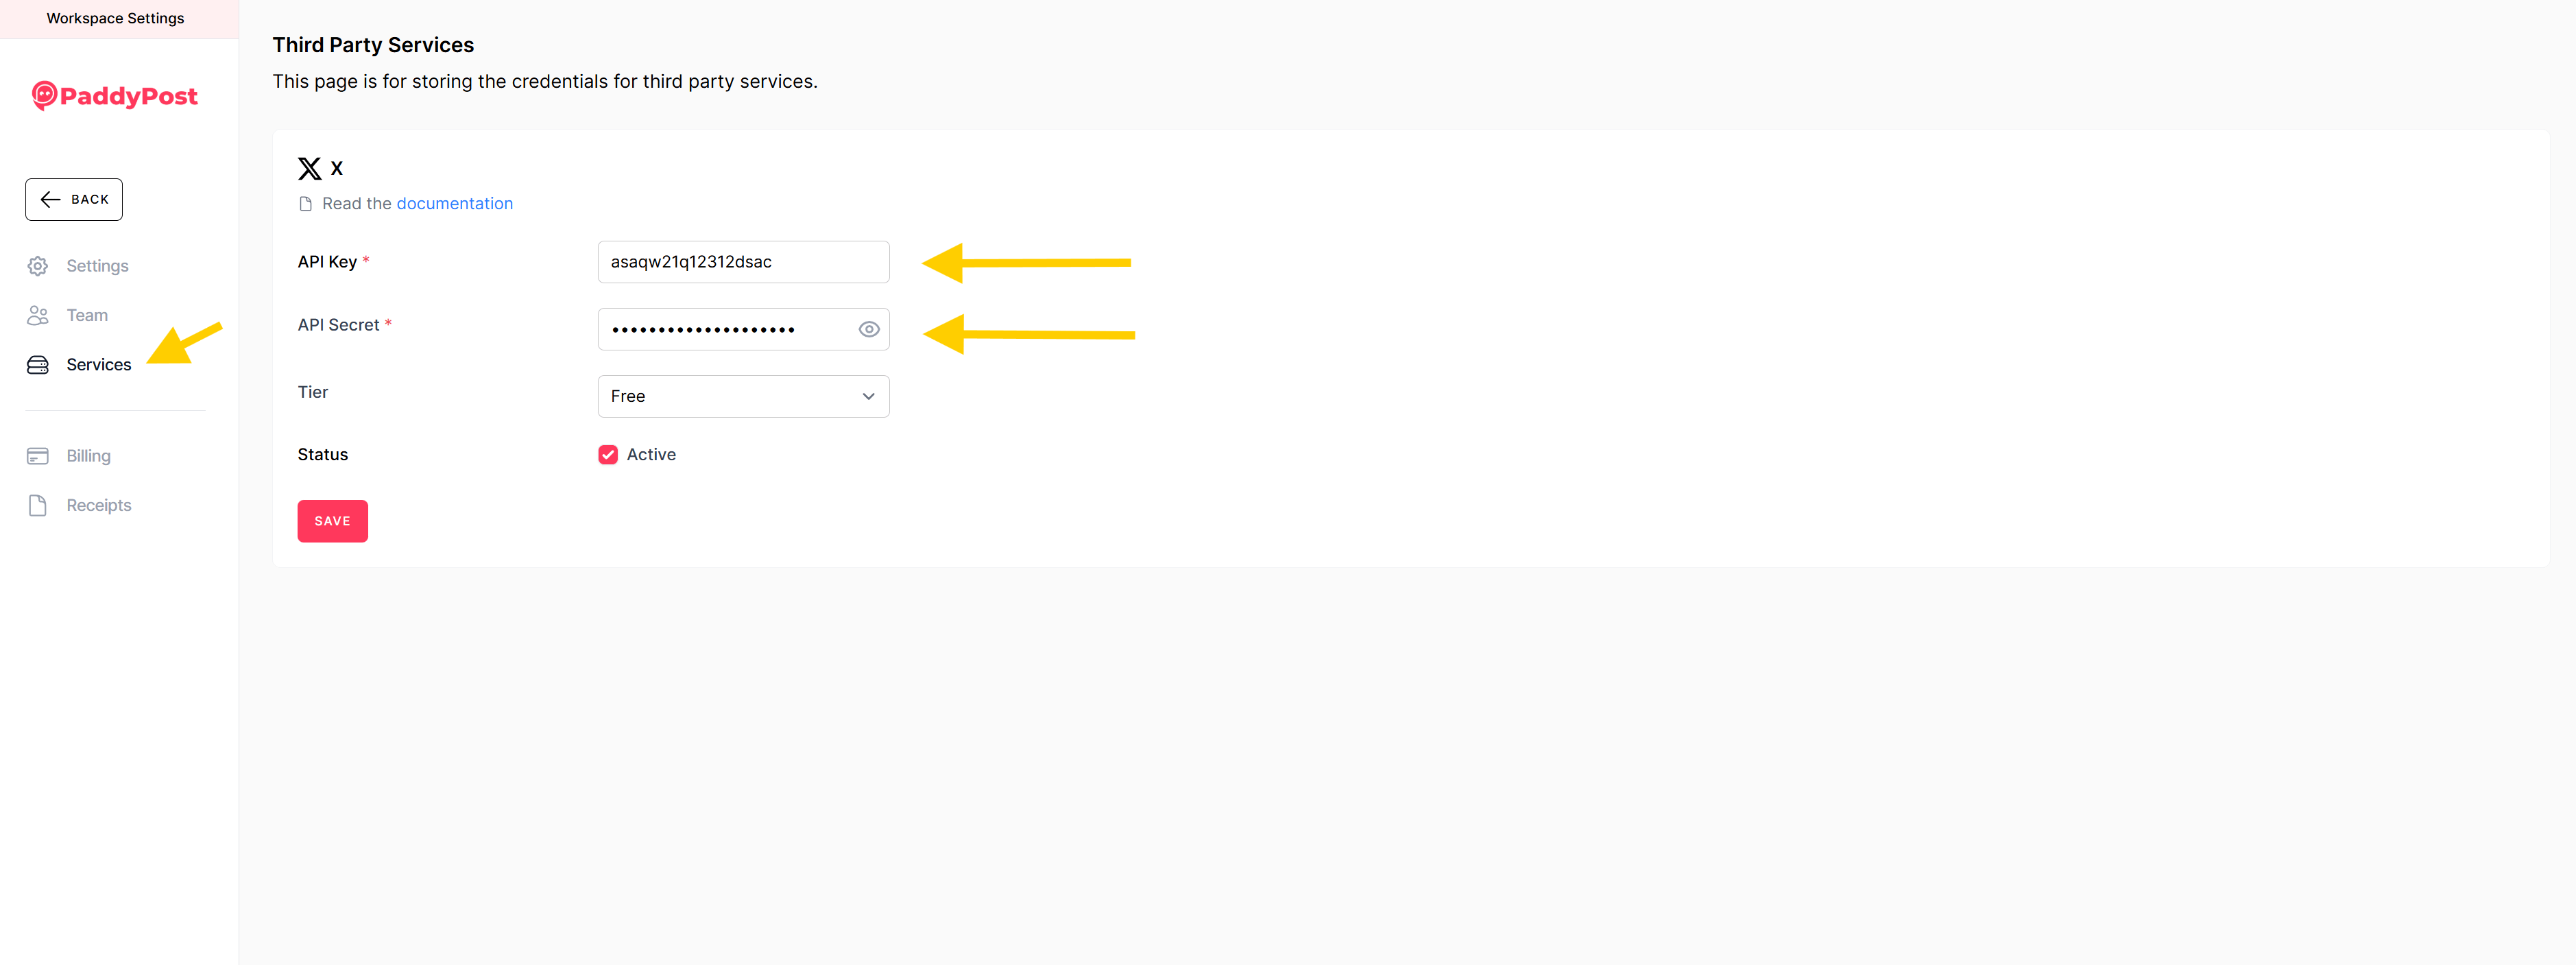
- Update the keys in PaddyPost under Settings > Services.
Posts stuck in Publishing
Posts stuck in Publishing
If you can connect your profile but posts are stuck in “Publishing”, you have likely run out of X API credits.Go to your X Developer Console and add more credits. We recommend at least $5, which gives you approximately 500 posts.
Error: 403 Forbidden / Posting Failed
Error: 403 Forbidden / Posting Failed
This usually indicates a permission issue.
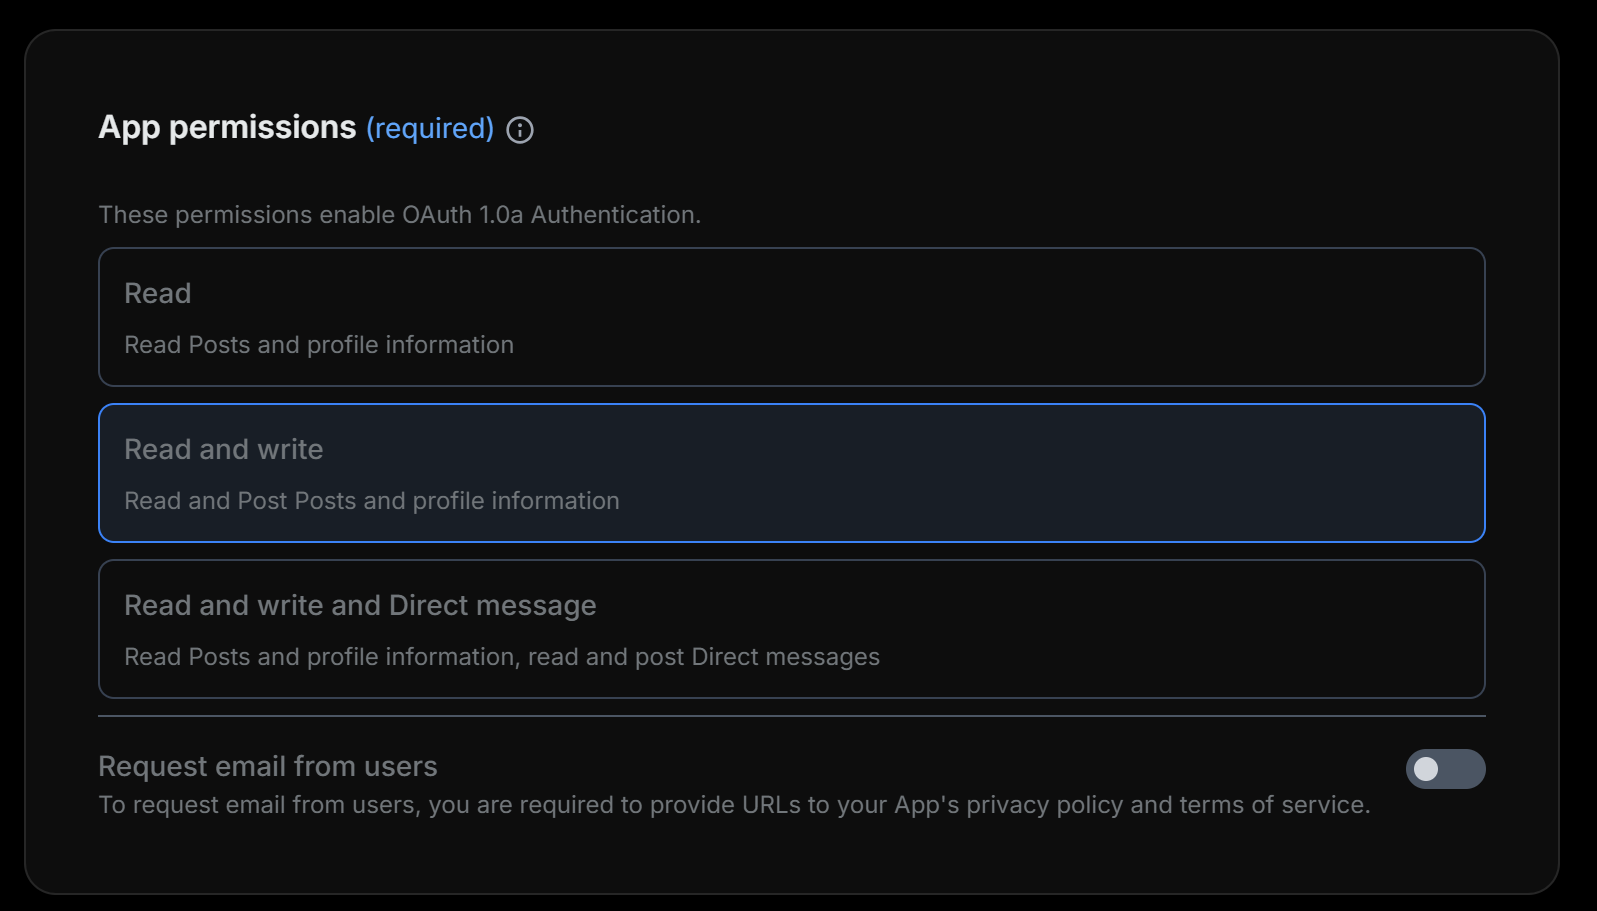
- Check App Permissions: Ensure Read and write is selected in “User authentication settings”.
- Regenerate Keys: If you changed permissions after generating keys, you must regenerate the Consumer Key and Secret.
Error: Callback URL mismatch
Error: Callback URL mismatch
Ensure the Callback URI in X Developer Console matches exactly:Check for trailing spaces or missing
https://.