Please note, this feature is only available on our Plus plan and higher.
Step 1: Access Team Settings
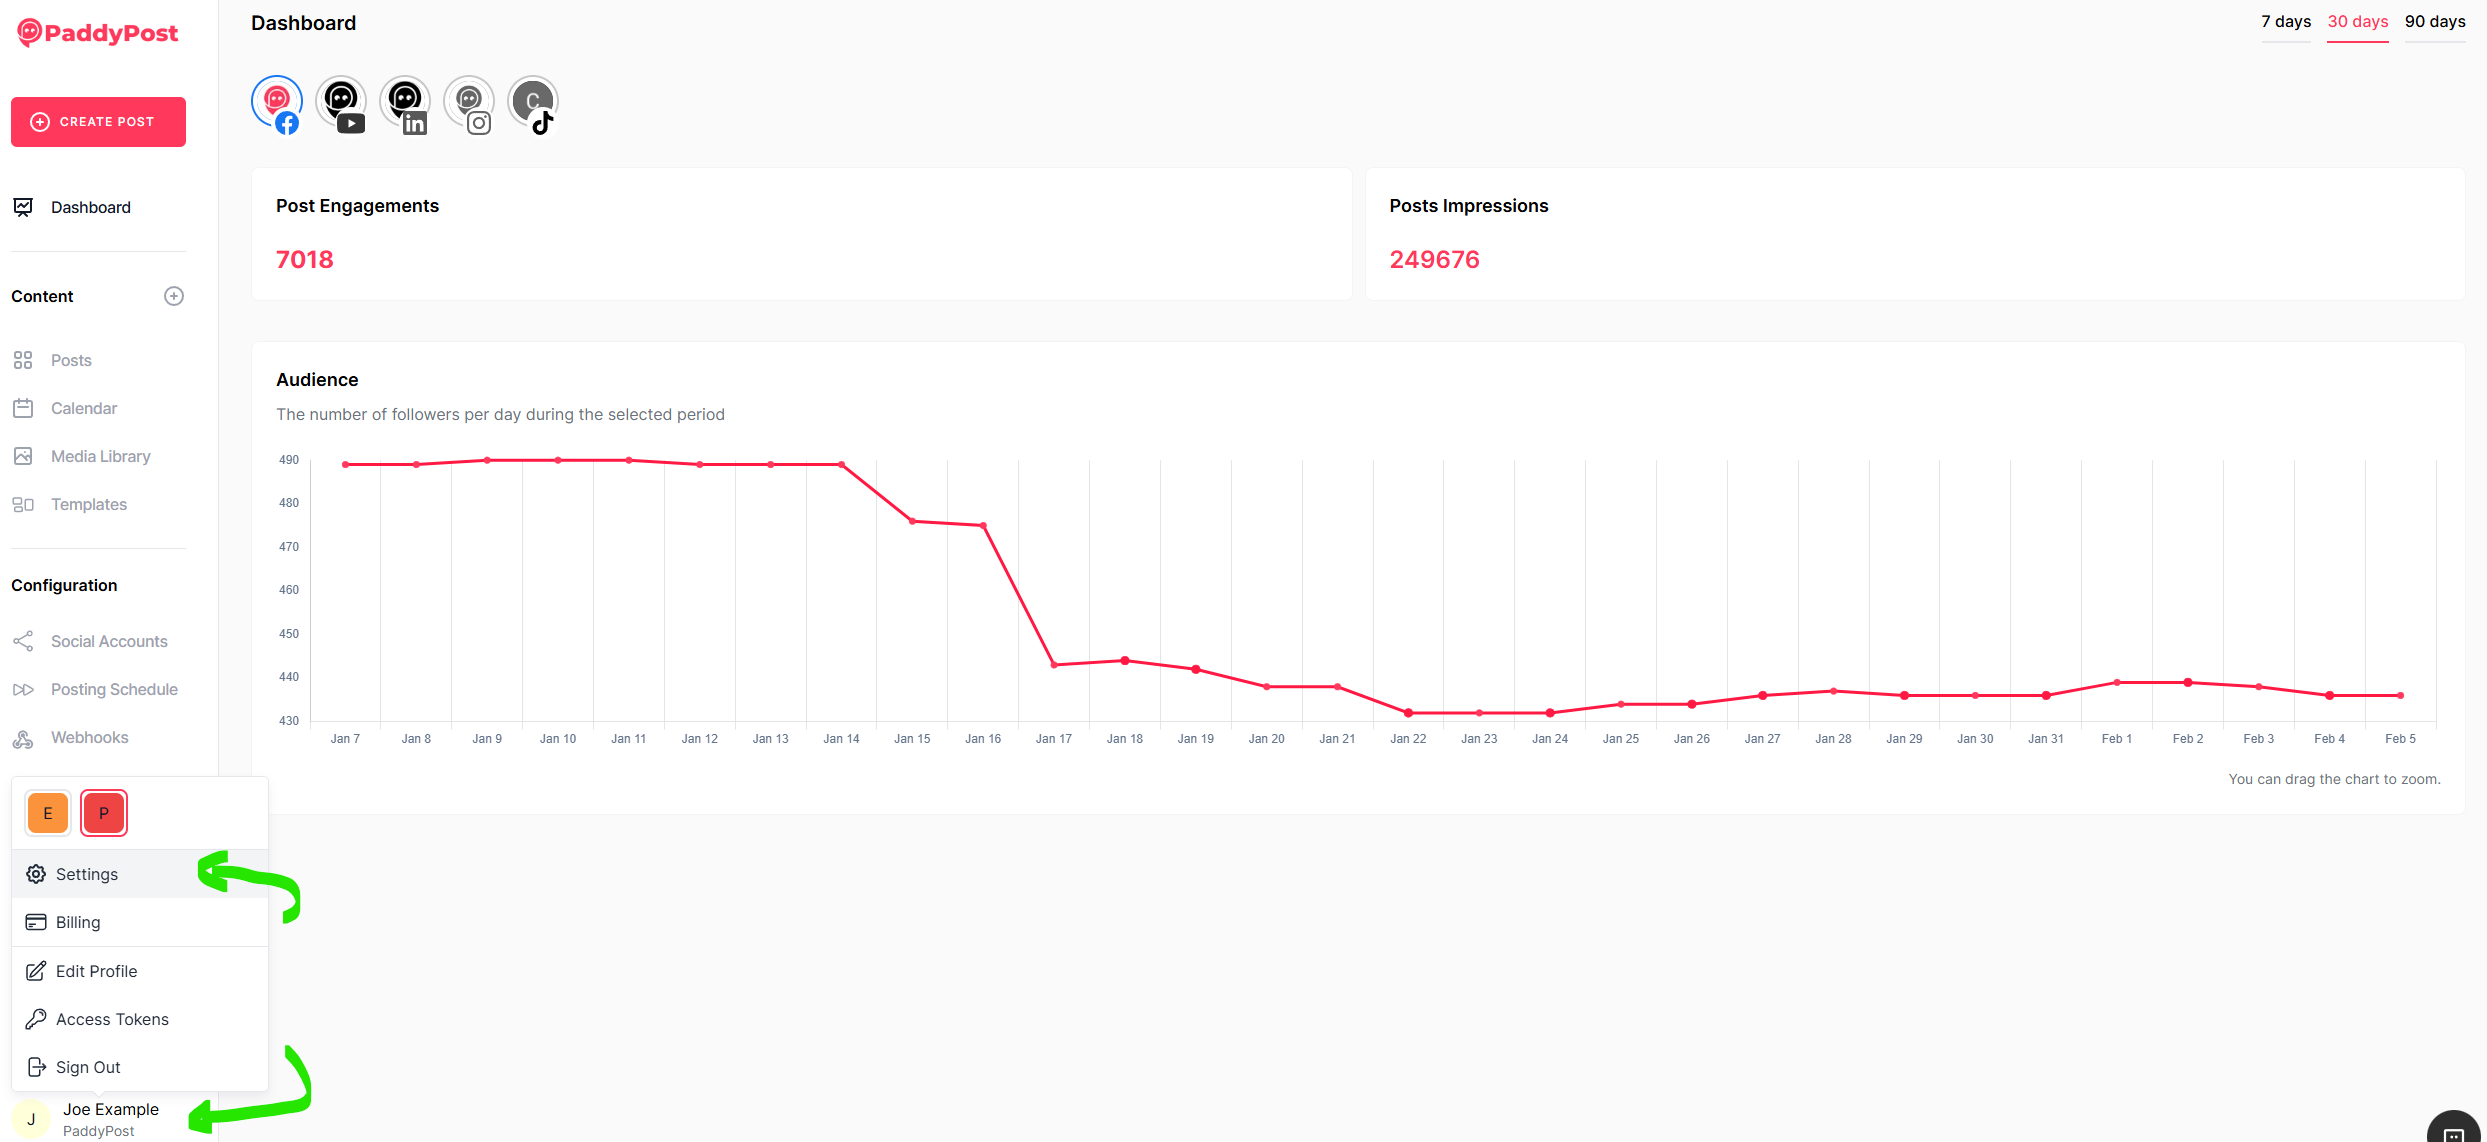
- Click on your profile picture in the bottom left corner.
- Select Settings from the menu.
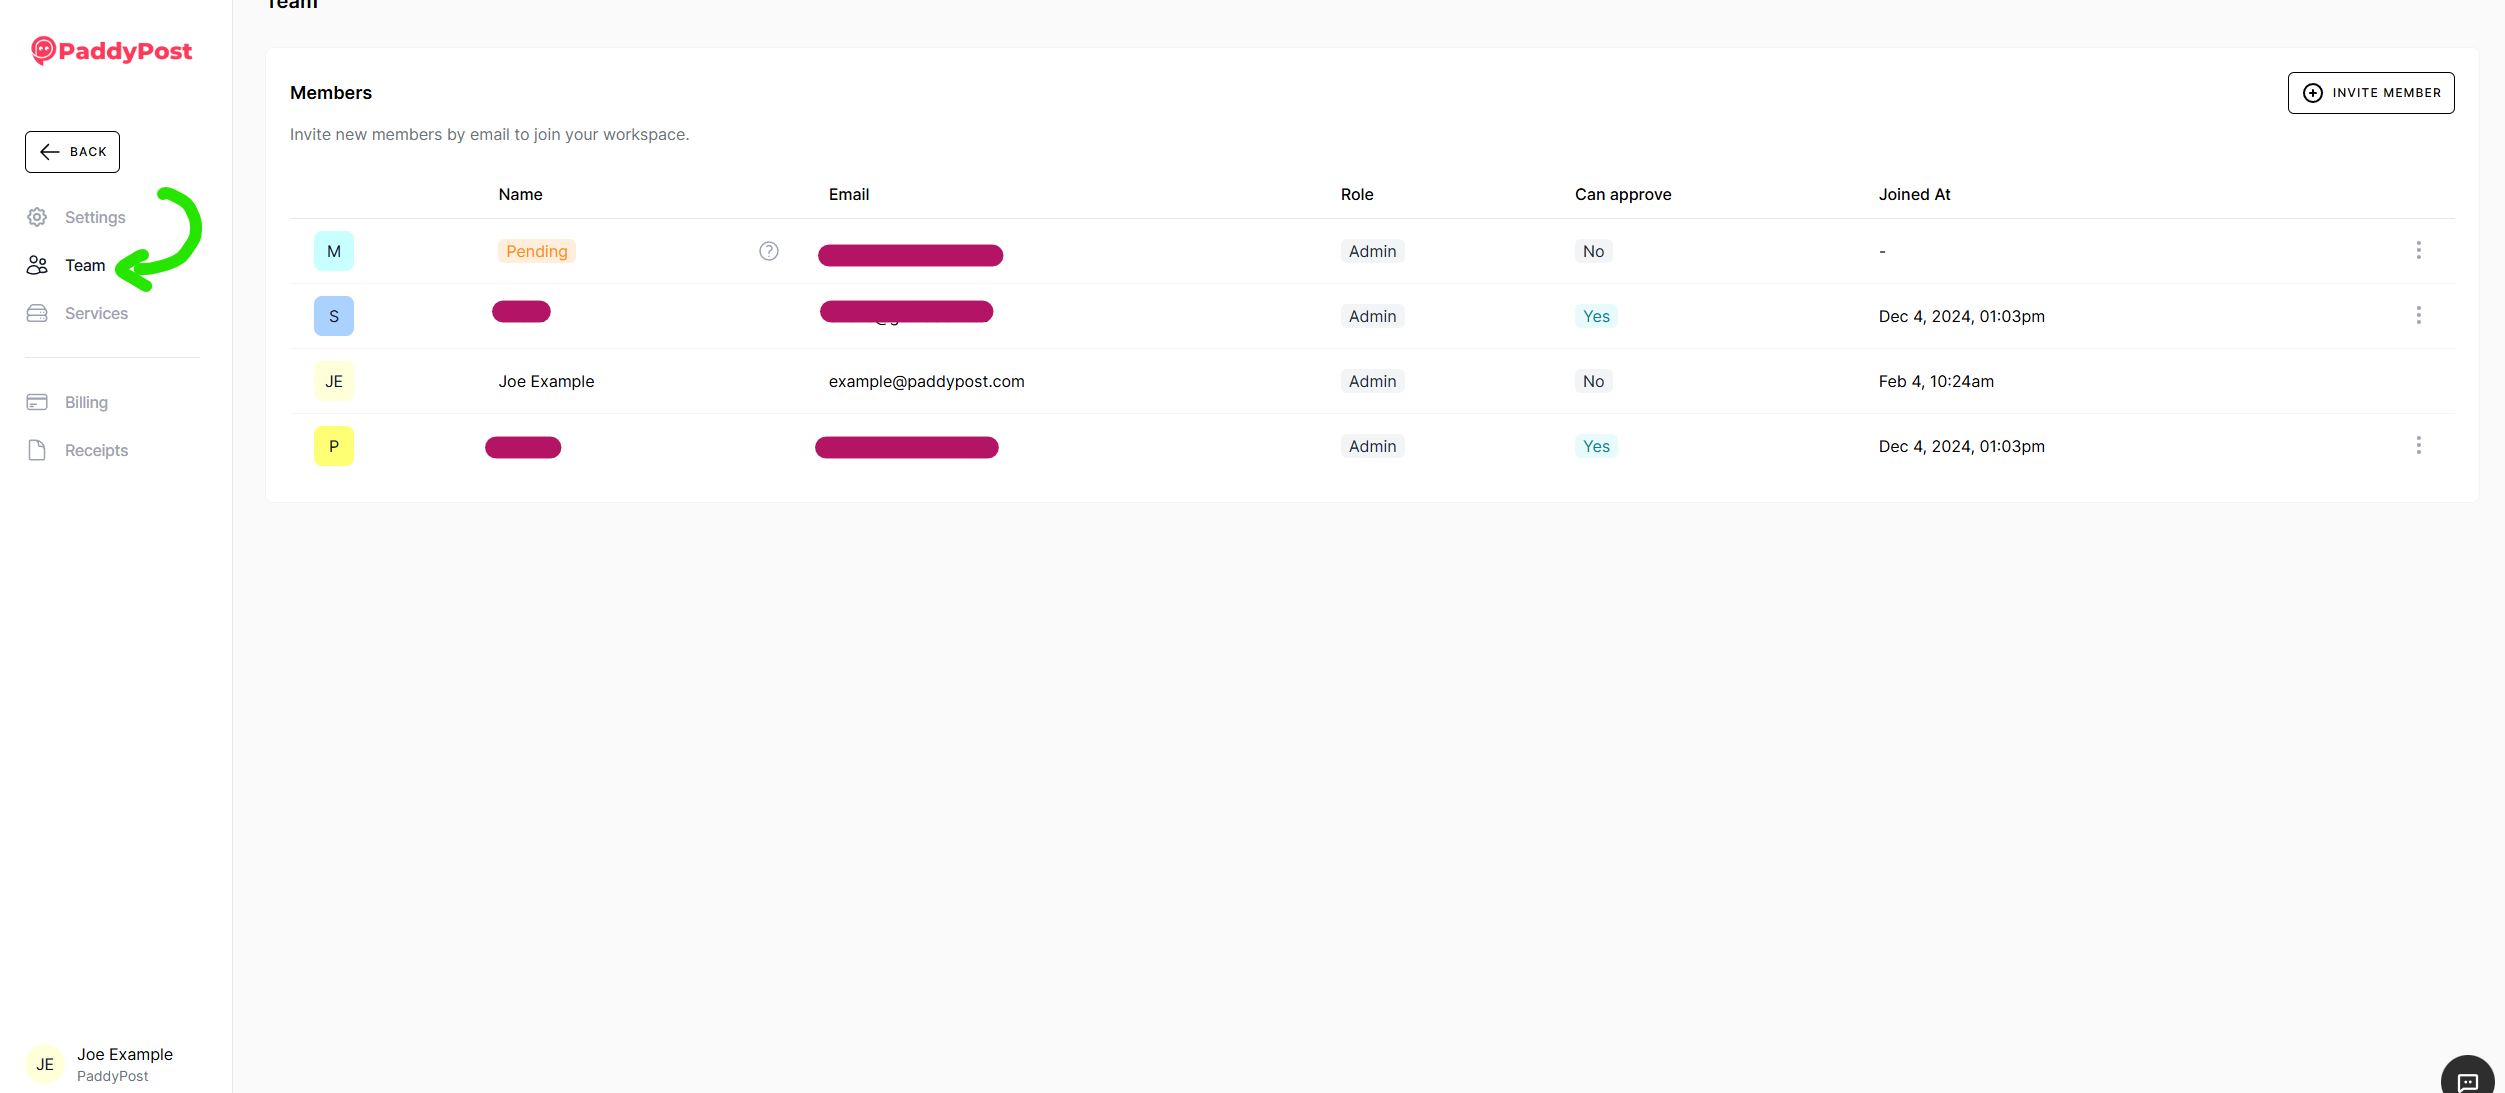
- Navigate to the Team tab—this is where you manage team members.


Step 2: Invite a New Team Member
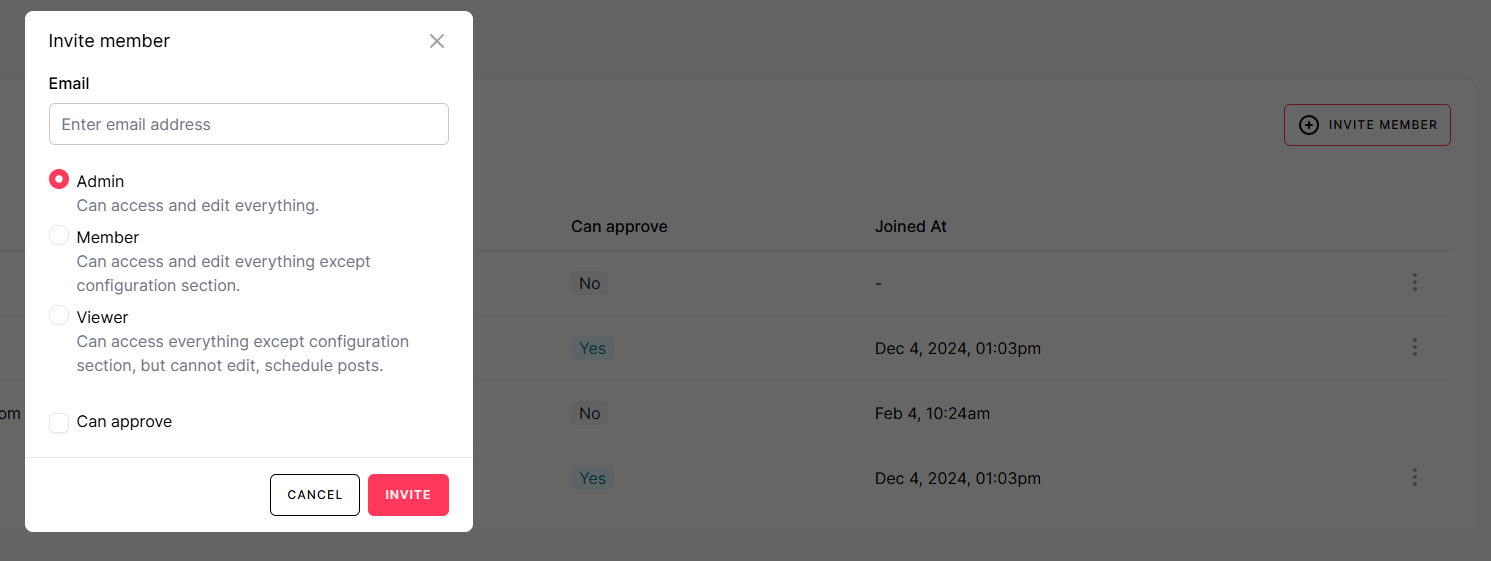
- Click the Invite Member button.
- Enter the email address of the person you want to invite.
- Assign one of the following roles:
- If needed, grant the "Can Approve" permission to allow a team member to approve posts, regardless of their role.
- Click Invite to send the invitation.

Step 3: Confirm Team Member Acceptance
- The invited user will receive an email invitation.
- Once they accept the invite, their status will update from Pending to their name in the Team tab.
Managing Existing Team Members
- Change roles: Click on a team member’s name and update their assigned role.
- Revoke access: Remove a team member if they no longer need access to the workspace.
Why Add Team Members?
✅ Better Collaboration – Assign roles to team members for efficient workflow.✅ Simplified Post Management – Allow members to create, edit, and approve posts.✅ Controlled Access – Grant permissions based on responsibility level.
With PaddyPost’s Team Management, your workspace remains organized and collaborative. Try it today to enhance your team’s productivity! 🚀
If you have any questions, reach out to PaddyPost Support. Happy collaborating! 🎉