> ## Documentation Index
> Fetch the complete documentation index at: https://support.paddypost.com/llms.txt
> Use this file to discover all available pages before exploring further.
# Connect X (Twitter)
> Configure your own X (Twitter) App to enable scheduling and publishing in PaddyPost.
Because X (Twitter) requires you to use your own API keys, you need to create an App in the X Developer Console and connect it to PaddyPost. This guide walks you through the entire process.
## Prerequisites
Before you begin, ensure you have:
* A verified **X (Twitter) account**.
* **Admin access** to your PaddyPost workspace.
## Step 1: Create a Developer Account
Go to [console.x.com](https://console.x.com/) and sign up for an account using your existing X (Twitter) account.
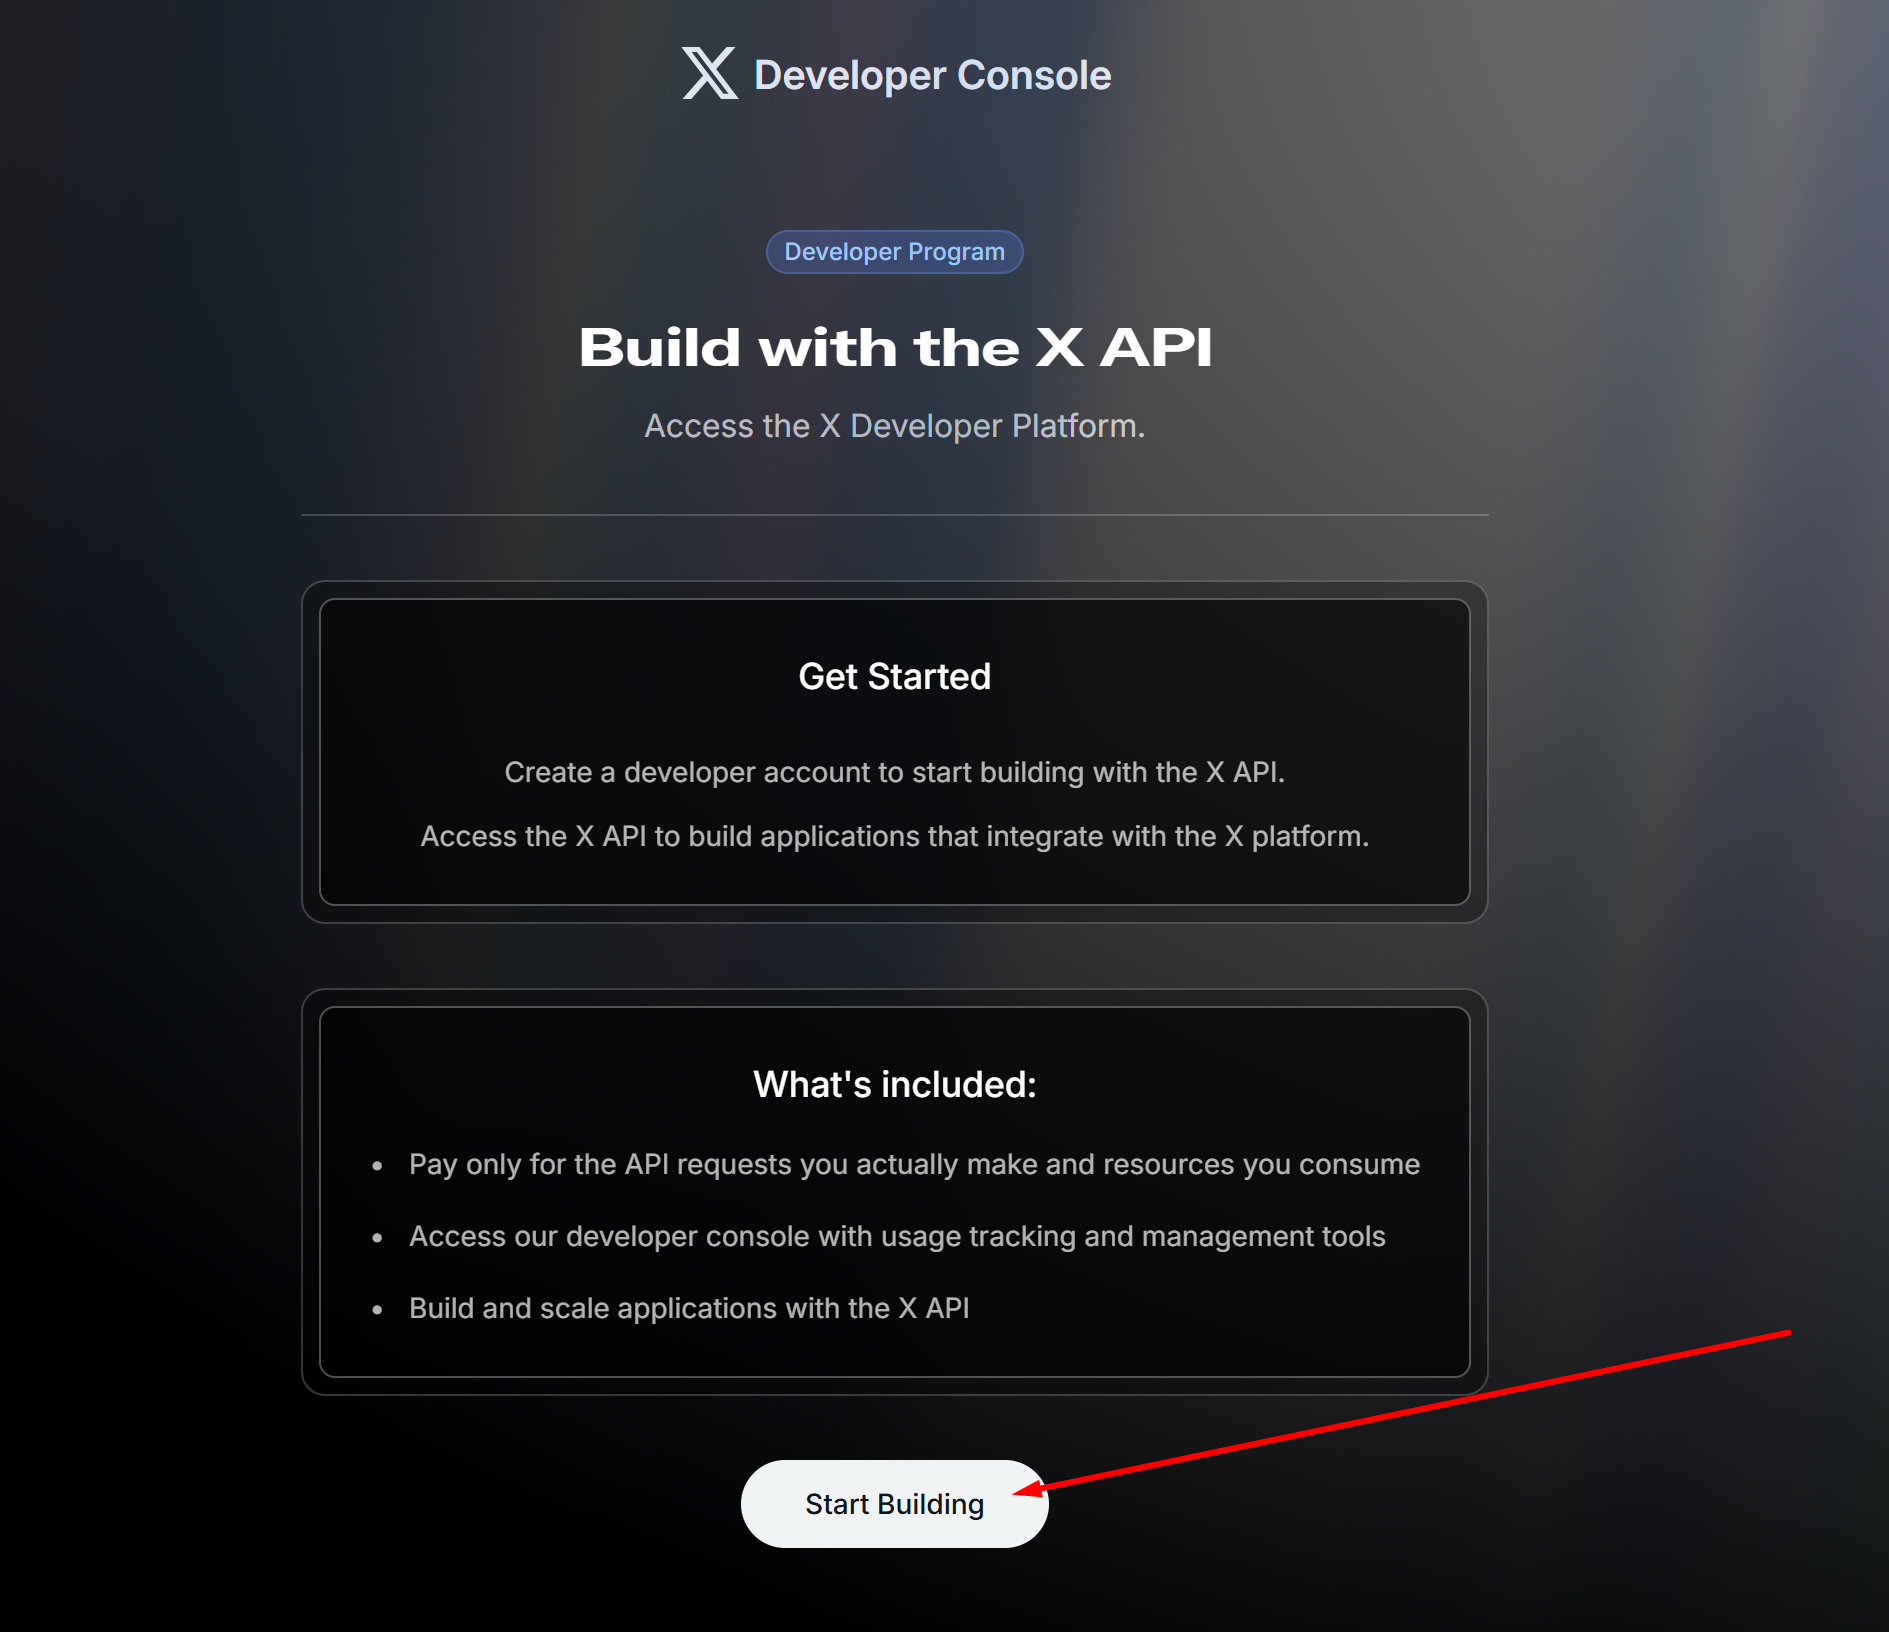
On the Developer Console page, click the **Start Building** button to begin setting up your developer access.
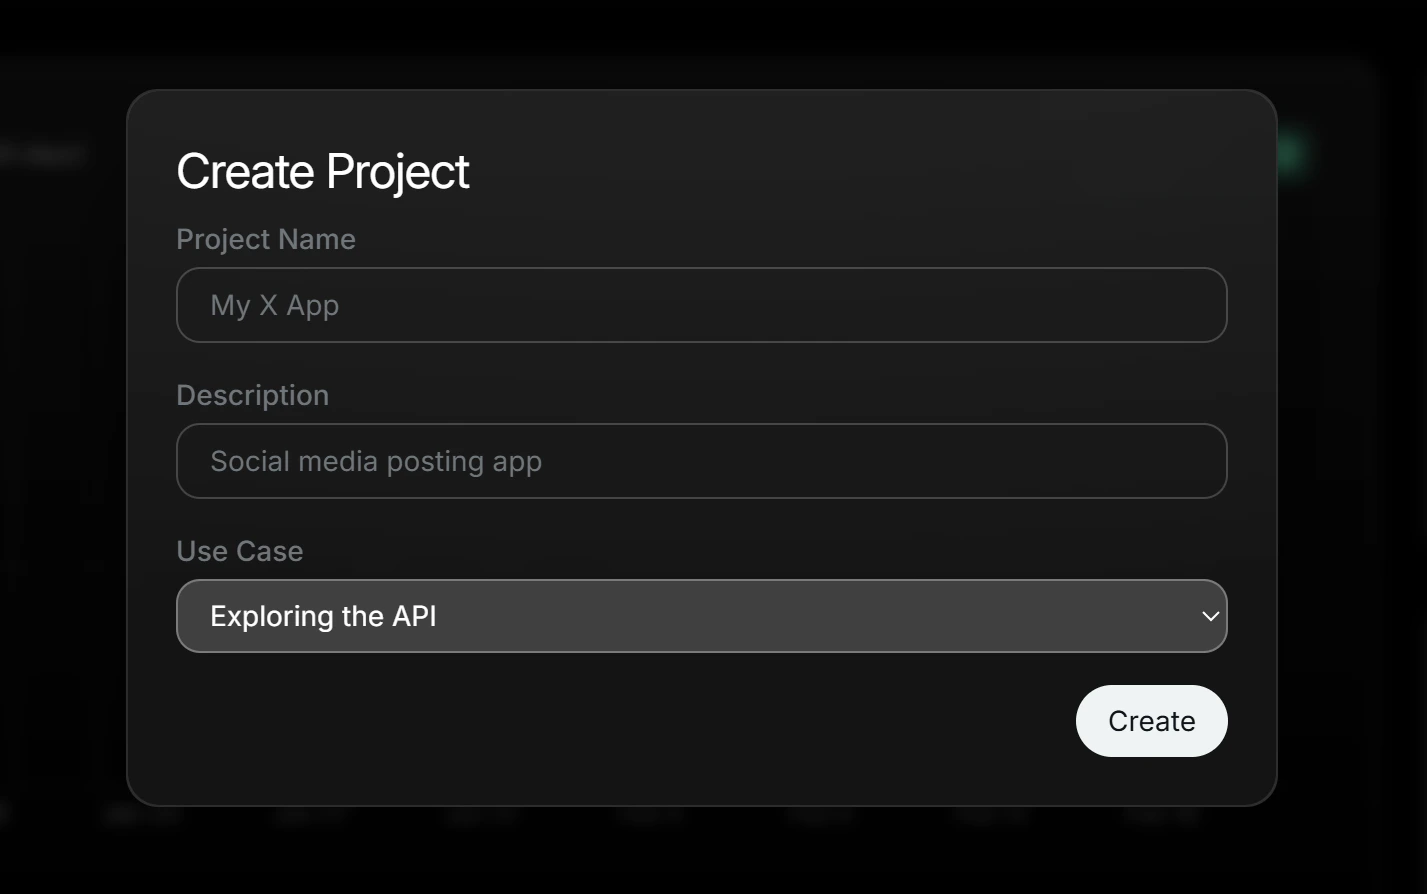
 You will be prompted to create your first Project. Fill in the following details:
* **Project Name**: Give it a name like "PaddyPost" or "My Scheduler".
* **Description**: Enter a short description (e.g., "Social media posting app").
* **Use Case**: Select **Exploring the API** from the dropdown.
Click **Create** to proceed.
You will be prompted to create your first Project. Fill in the following details:
* **Project Name**: Give it a name like "PaddyPost" or "My Scheduler".
* **Description**: Enter a short description (e.g., "Social media posting app").
* **Use Case**: Select **Exploring the API** from the dropdown.
Click **Create** to proceed.
 ## Step 2: Create an App
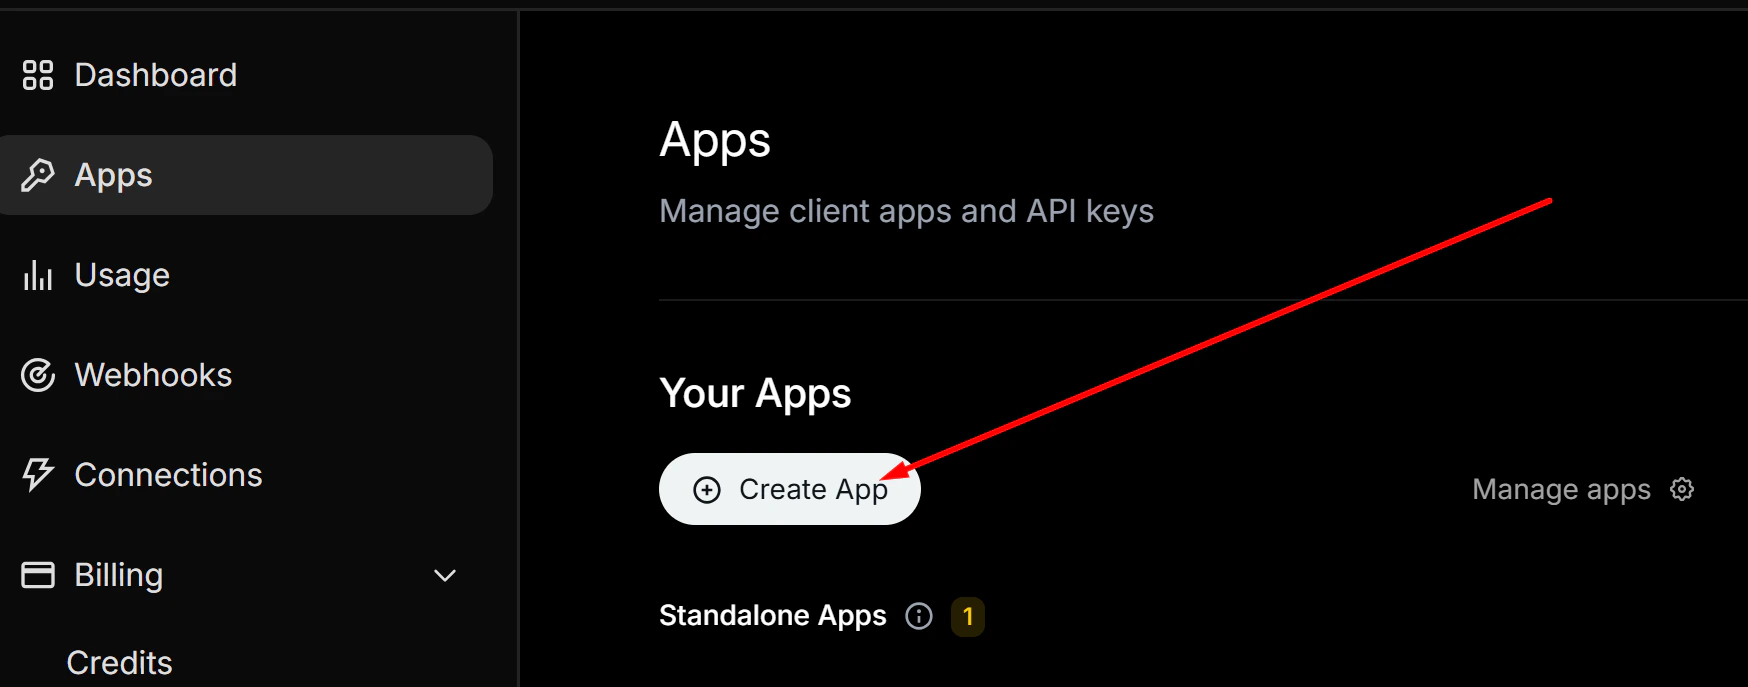
On the Dashboard, click **Apps** in the sidebar, then click **Create App**.
## Step 2: Create an App
On the Dashboard, click **Apps** in the sidebar, then click **Create App**.
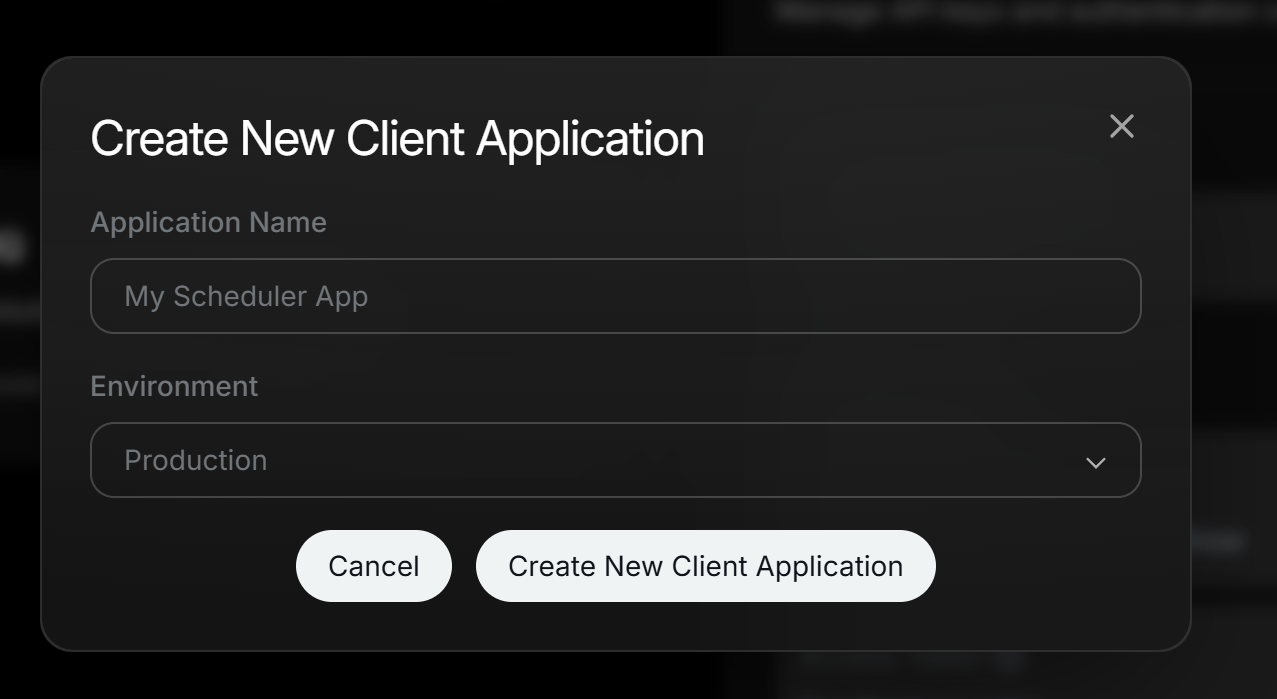
 * **Application Name**: Choose a unique name (e.g., "My Scheduler App").
* **Environment**: Set this to **Production**.
Click **Create New Client Application**.
* **Application Name**: Choose a unique name (e.g., "My Scheduler App").
* **Environment**: Set this to **Production**.
Click **Create New Client Application**.
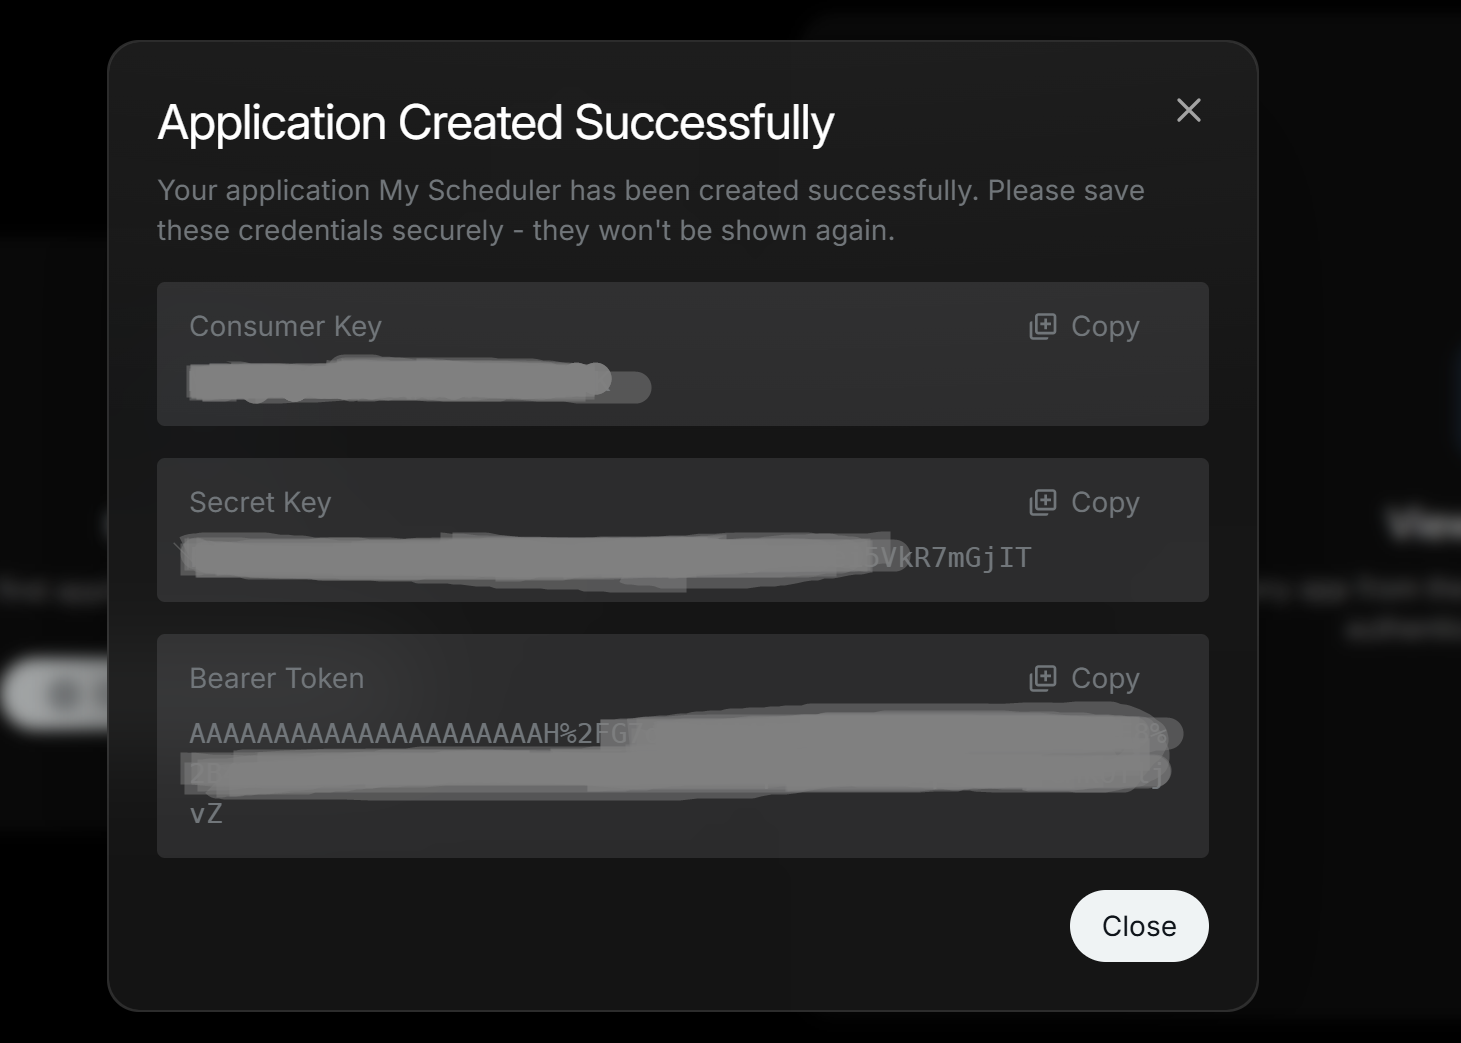
 After creation, you will be shown your **Consumer Key** and **Secret Key**. Copy both and save them in a secure place — they will not be shown again.
**Important**: Save the **Consumer Key** and **Secret Key** now. You will need them later when configuring PaddyPost.
After creation, you will be shown your **Consumer Key** and **Secret Key**. Copy both and save them in a secure place — they will not be shown again.
**Important**: Save the **Consumer Key** and **Secret Key** now. You will need them later when configuring PaddyPost.
 ## Step 3: Set Up User Authentication
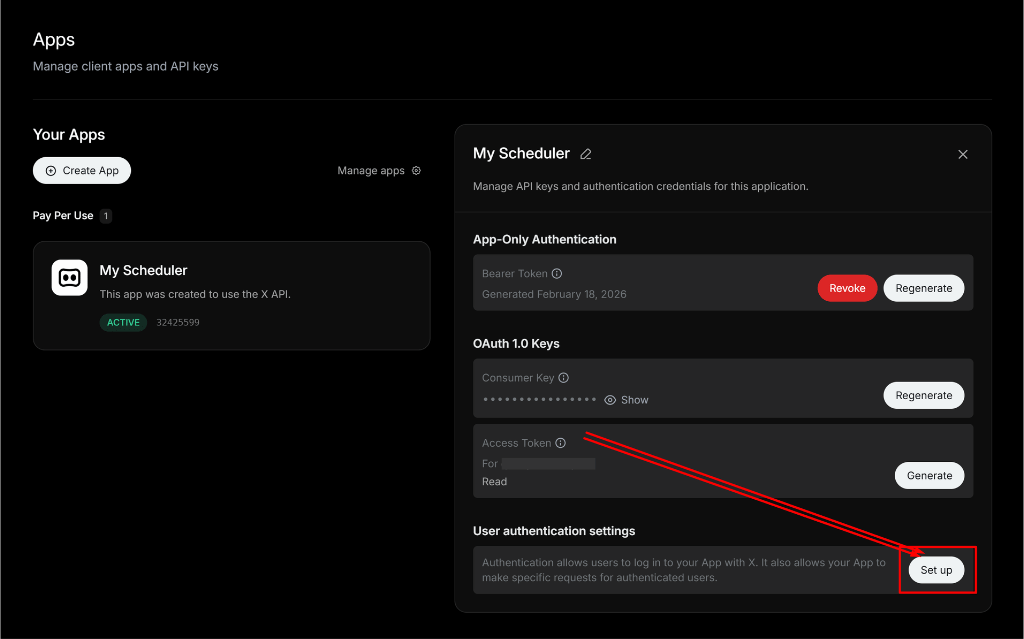
Click on your newly created App. Under **User authentication settings**, click the **Set up** button.
## Step 3: Set Up User Authentication
Click on your newly created App. Under **User authentication settings**, click the **Set up** button.
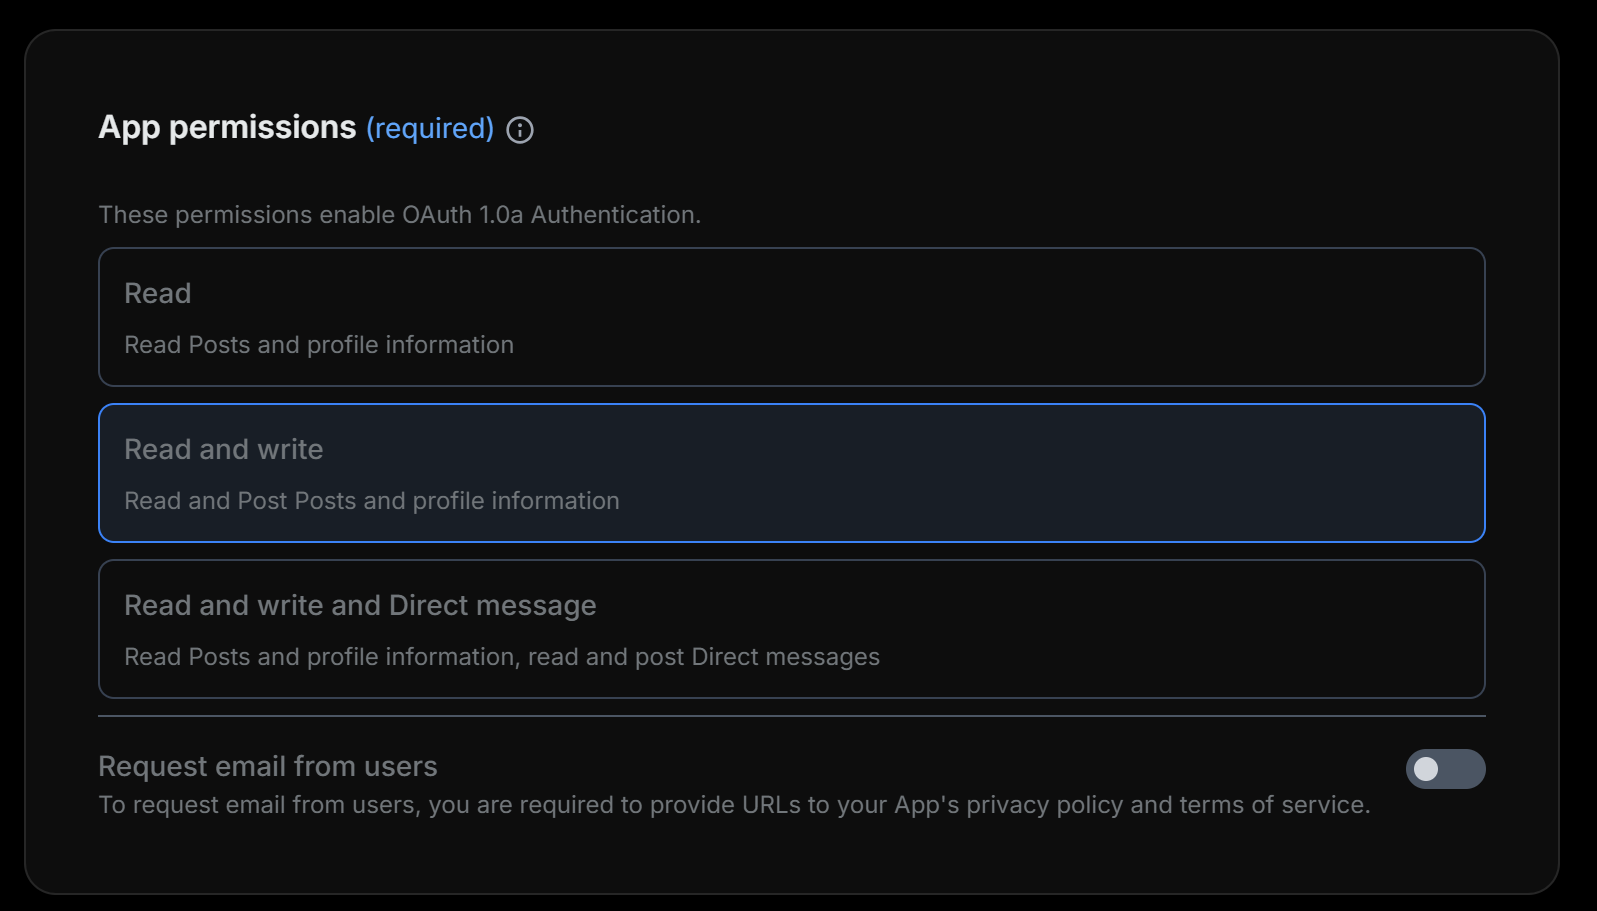
 Under **App permissions**, select **Read and write**.
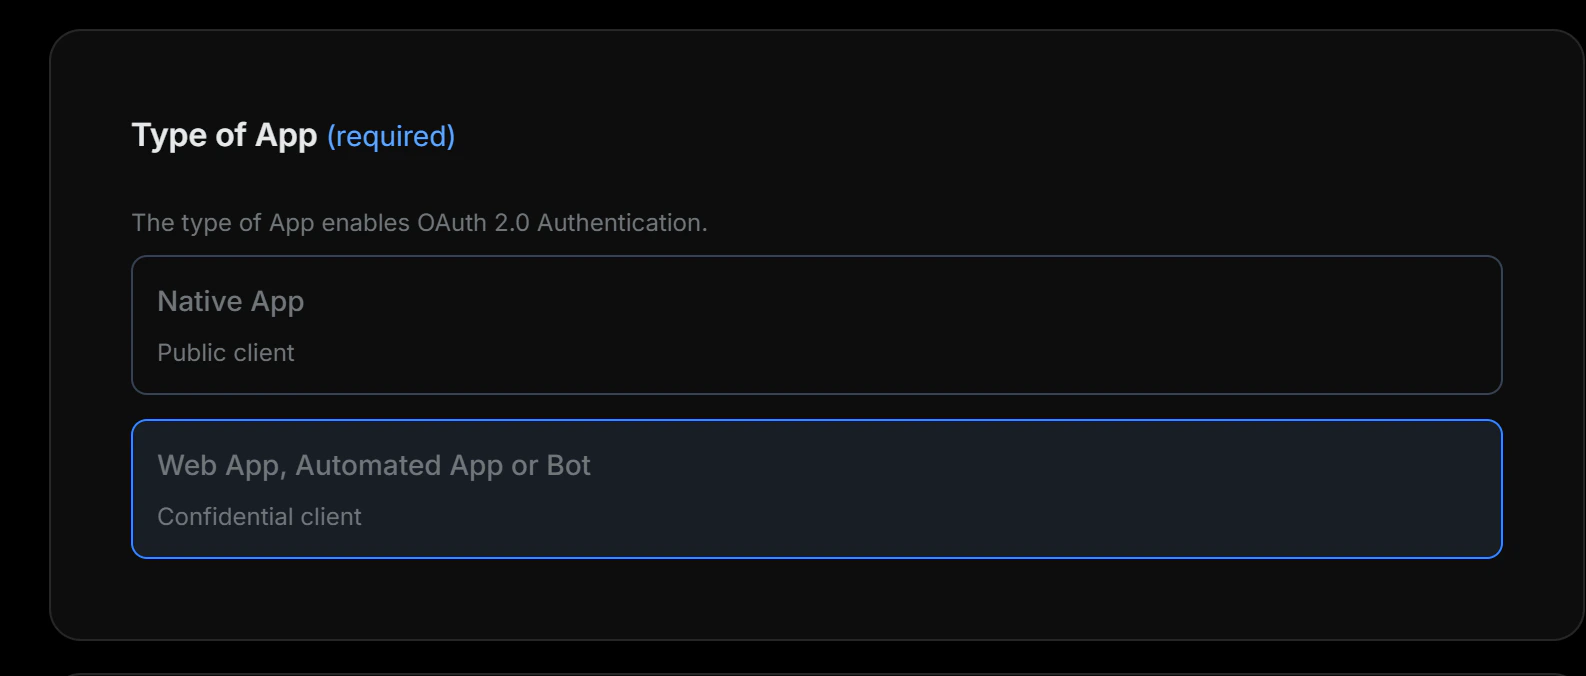
 Under **Type of App**, select **Web App, Automated App or Bot**.
 Under **App info**, enter the following:
* **Callback URI / Redirect URL**:
```
https://app.paddypost.com/paddypost/callback/twitter
```
* **Website URL**: Enter your main website URL (e.g., `https://your-company.com`).
Ensure you enter the callback URL **exactly** as shown above. Any mismatch will prevent your account from connecting.
Under **App info**, enter the following:
* **Callback URI / Redirect URL**:
```
https://app.paddypost.com/paddypost/callback/twitter
```
* **Website URL**: Enter your main website URL (e.g., `https://your-company.com`).
Ensure you enter the callback URL **exactly** as shown above. Any mismatch will prevent your account from connecting.
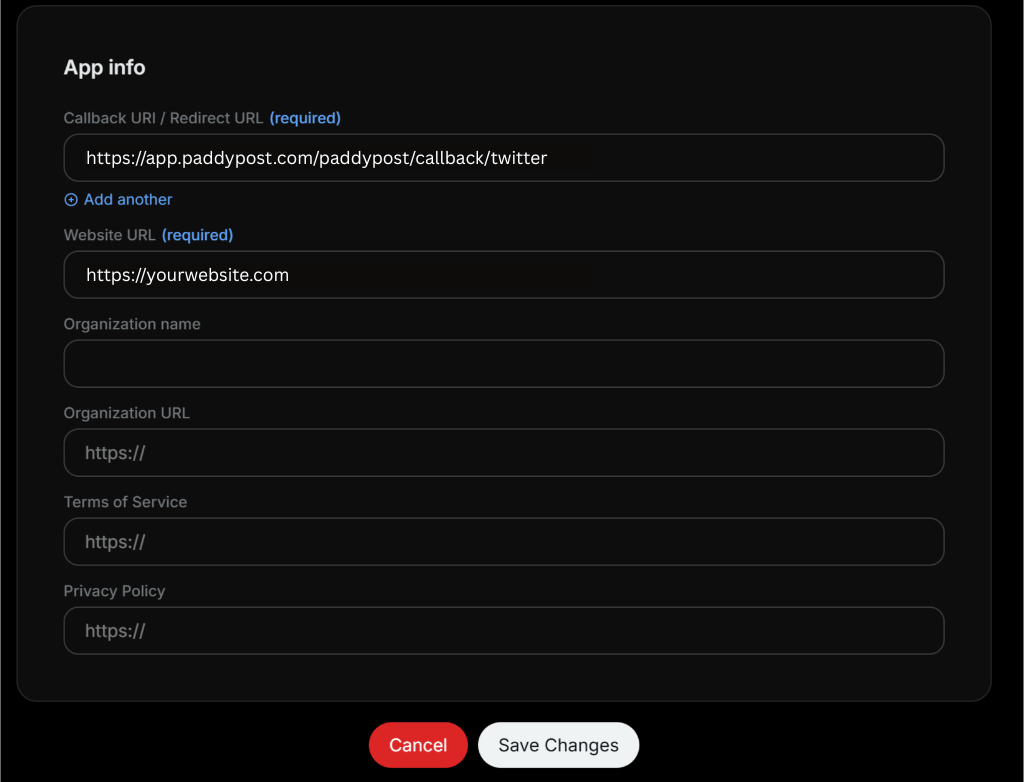 Click **Save Changes** at the bottom of the page.
You do **not** need to copy the Client ID or Client Secret shown after saving. You only need the **Consumer Key** and **Secret Key** you saved in Step 2.
## Step 4: Add Credits to Your X Developer Account
X requires you to add credits to your developer account before you can make API calls.
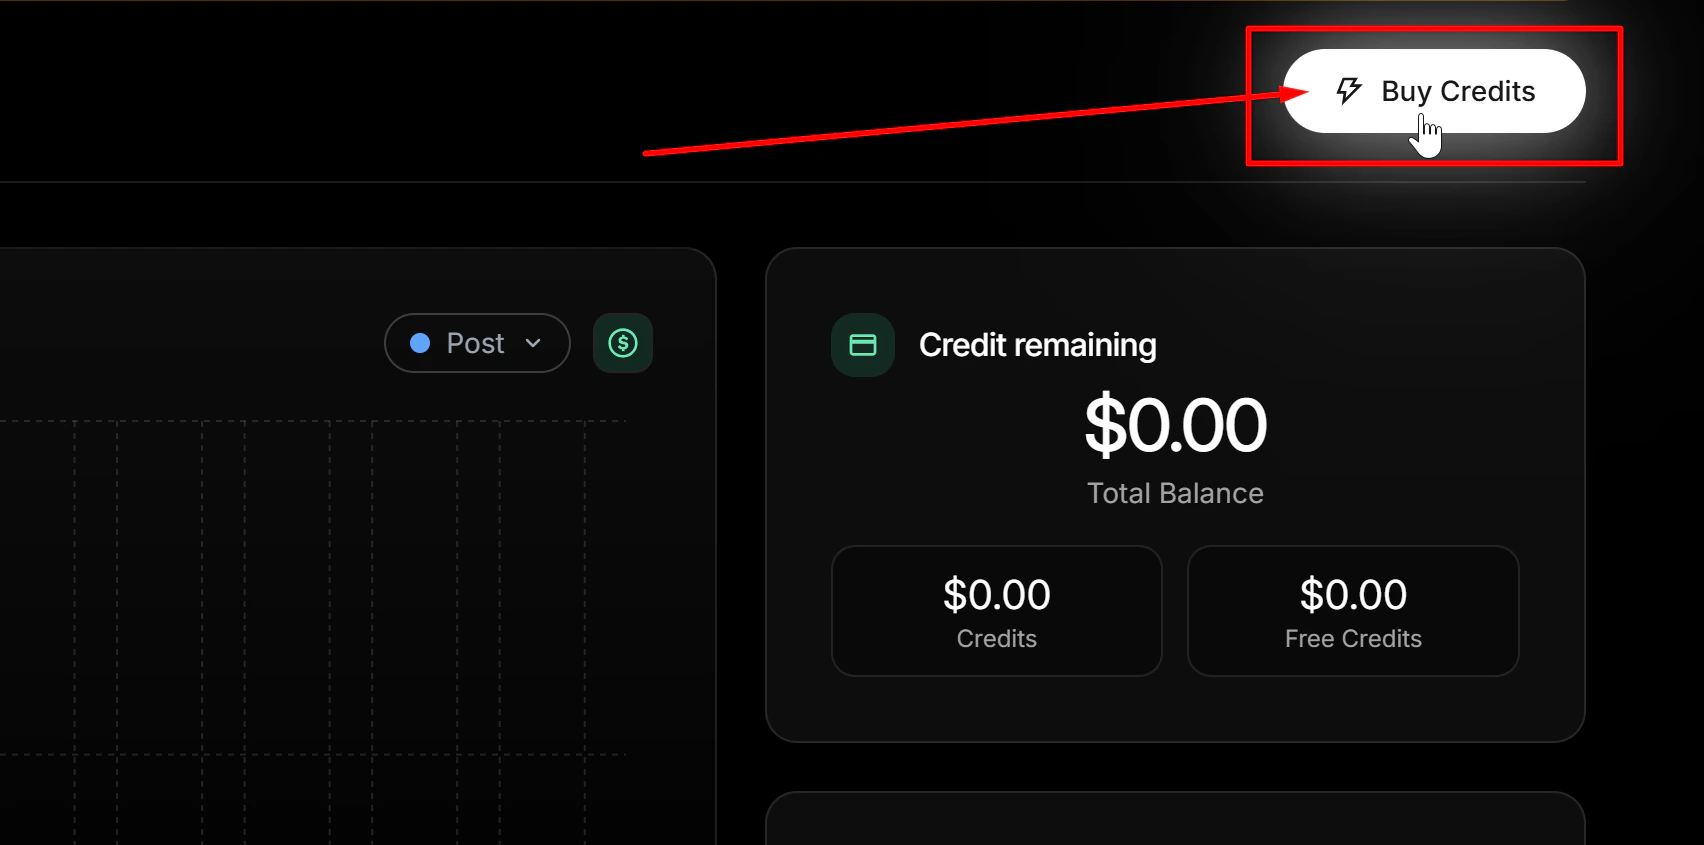
On your X Developer Console dashboard, click the **Buy Credits** button in the top right.
Click **Save Changes** at the bottom of the page.
You do **not** need to copy the Client ID or Client Secret shown after saving. You only need the **Consumer Key** and **Secret Key** you saved in Step 2.
## Step 4: Add Credits to Your X Developer Account
X requires you to add credits to your developer account before you can make API calls.
On your X Developer Console dashboard, click the **Buy Credits** button in the top right.
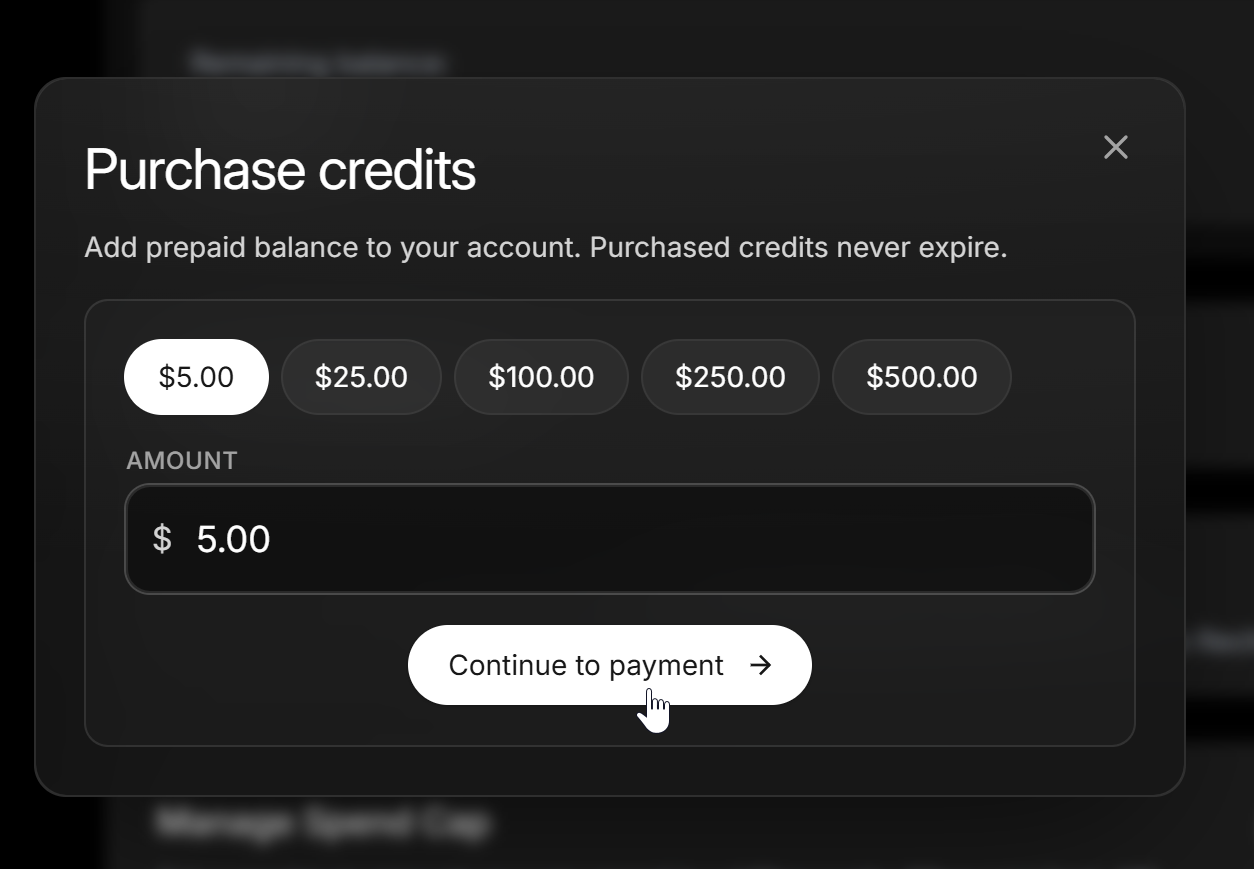
 Select the amount you want to add. We recommend at least **\$5**, which gives you approximately **500 posts**.
Click **Continue to payment** and complete the purchase.
Select the amount you want to add. We recommend at least **\$5**, which gives you approximately **500 posts**.
Click **Continue to payment** and complete the purchase.
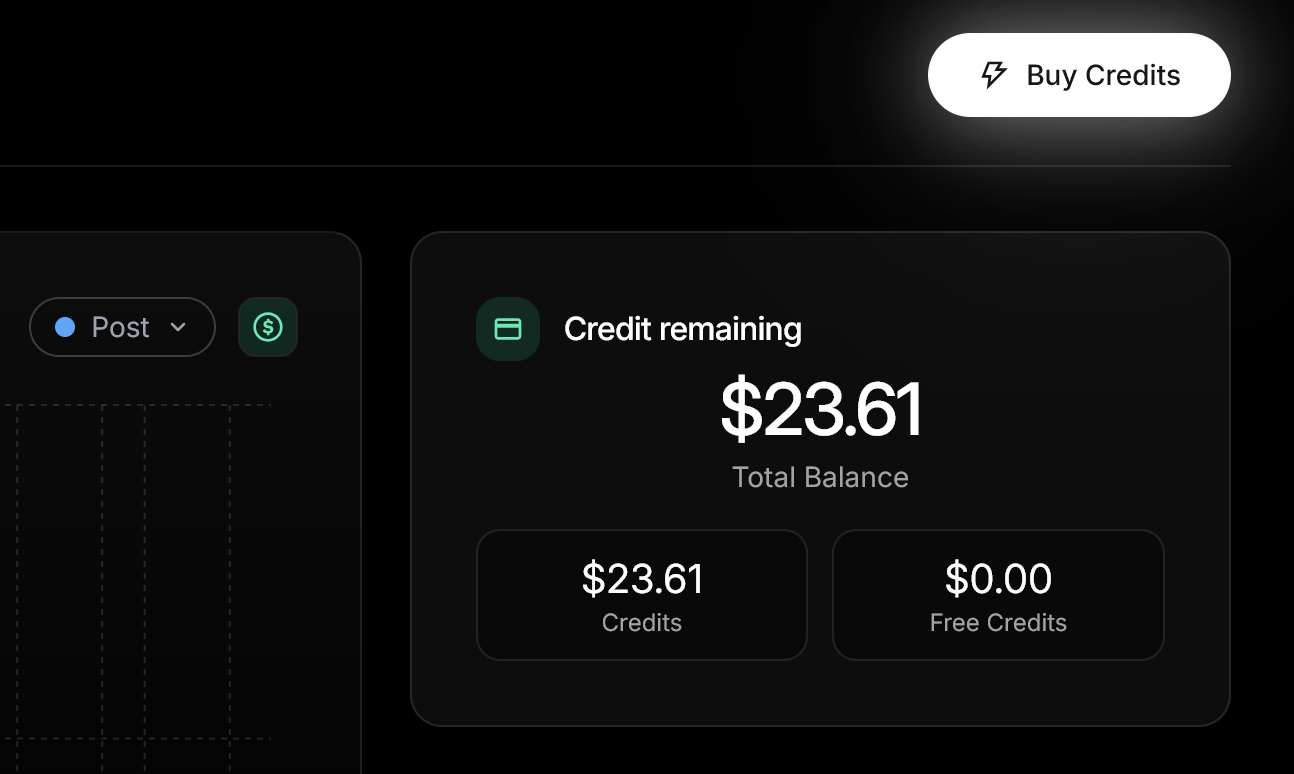
 After payment, you will see your updated credit balance on the dashboard.
 ## Step 5: Configure PaddyPost
Log in to PaddyPost as an Admin. Click on your profile menu and select **Settings**.
## Step 5: Configure PaddyPost
Log in to PaddyPost as an Admin. Click on your profile menu and select **Settings**.
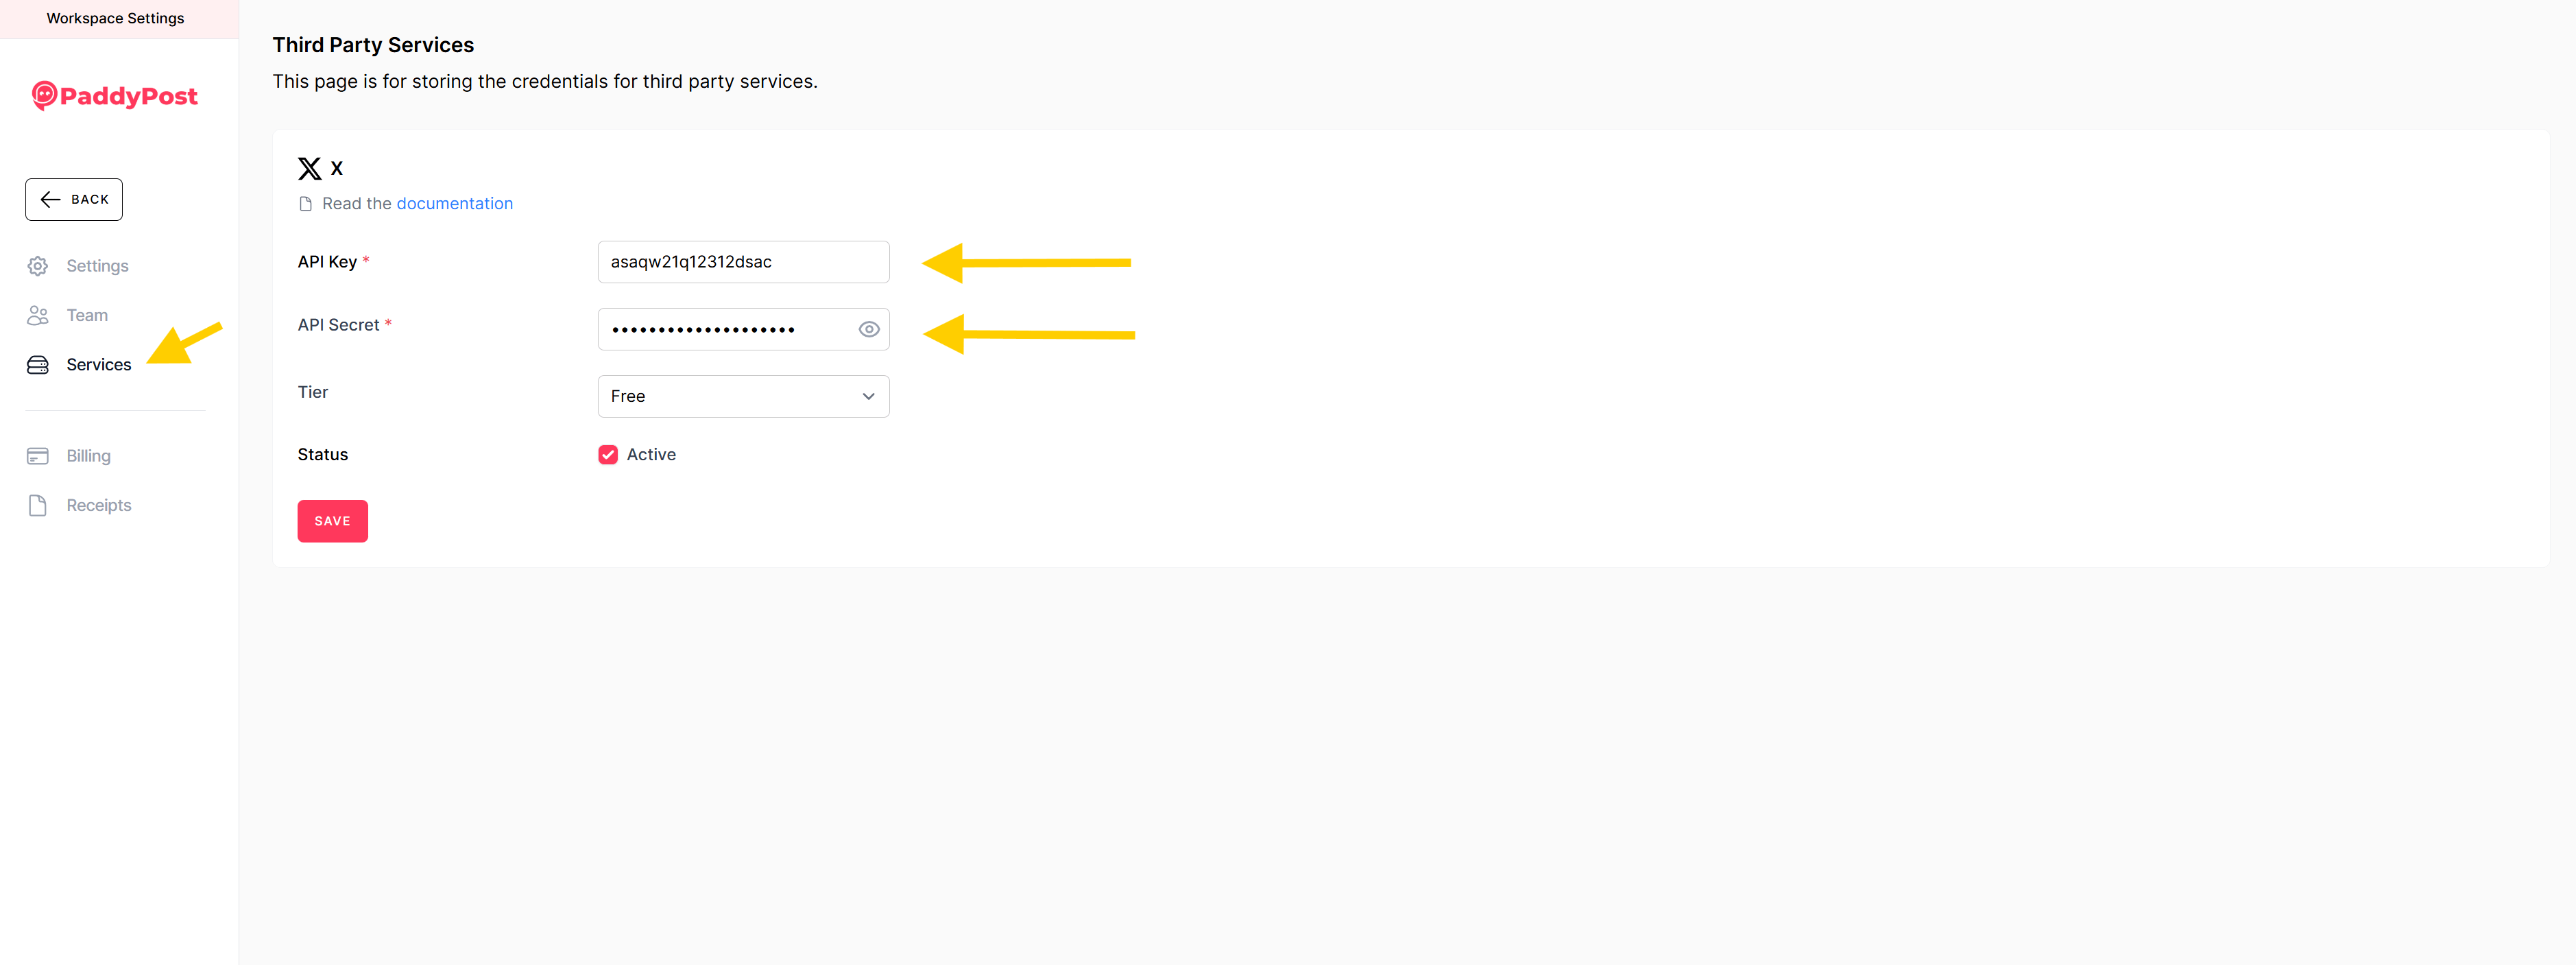
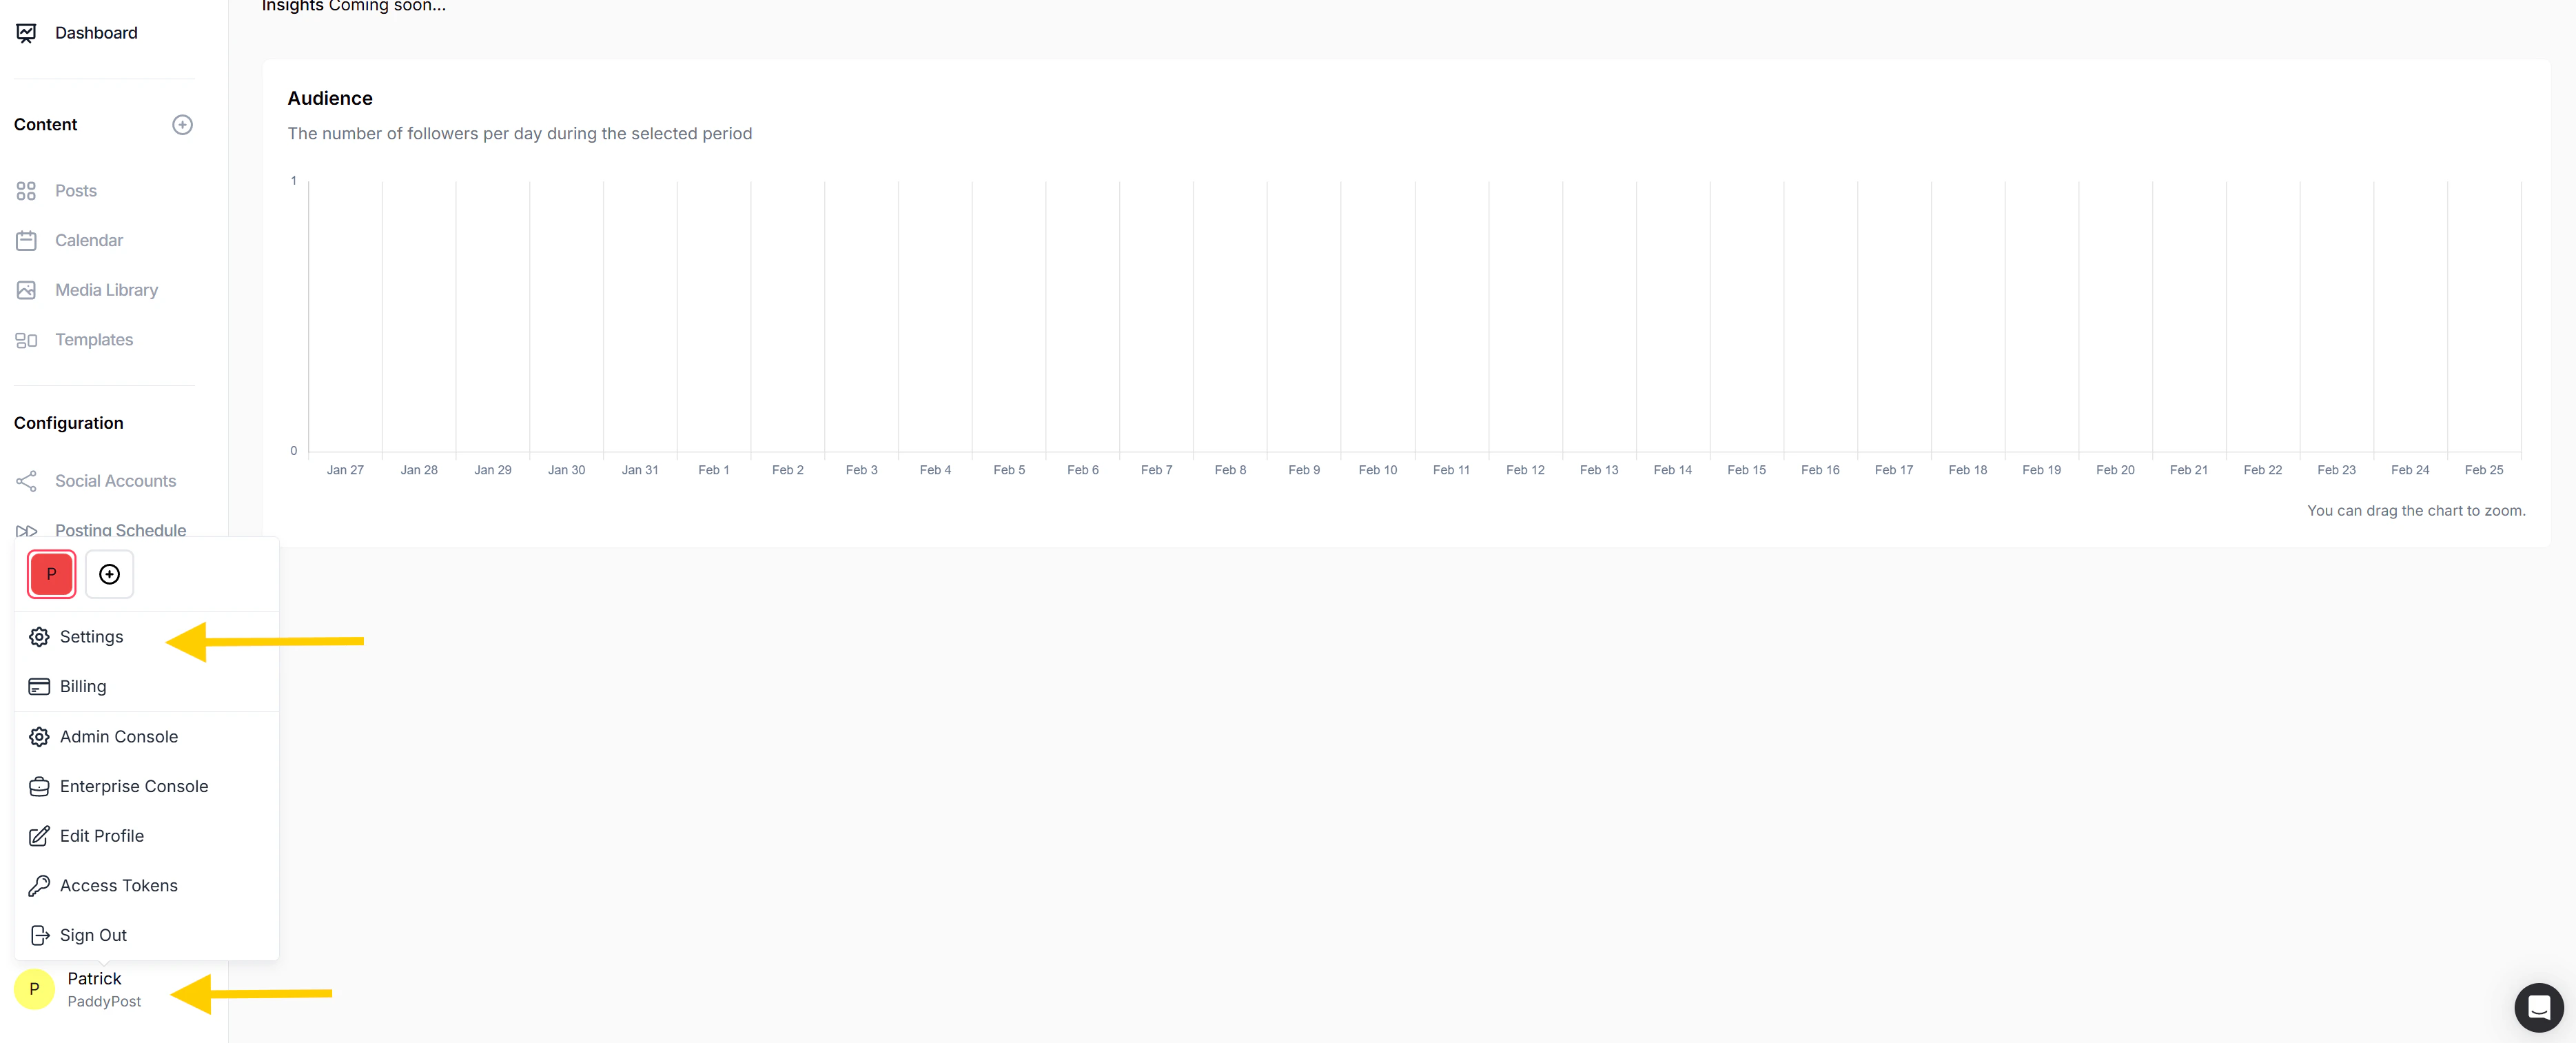 In the Settings sidebar, click **Services**.
Find the **X** service and enter the following:
* **API Key**: Paste the **Consumer Key** you saved in Step 2.
* **API Secret**: Paste the **Secret Key** you saved in Step 2.
* **Tier**: Select **Free** (or Basic if you have upgraded your X developer plan).
* **Status**: Tick the **Active** checkbox.
Click **Save**.
In the Settings sidebar, click **Services**.
Find the **X** service and enter the following:
* **API Key**: Paste the **Consumer Key** you saved in Step 2.
* **API Secret**: Paste the **Secret Key** you saved in Step 2.
* **Tier**: Select **Free** (or Basic if you have upgraded your X developer plan).
* **Status**: Tick the **Active** checkbox.
Click **Save**.
 ## Step 6: Connect Your Account
Navigate to the **Accounts** page in the PaddyPost sidebar.
Click **Add Account** and select **X**.
You will be redirected to X (Twitter). Click **Authorize app** to grant PaddyPost permission to post on your behalf.
## Troubleshooting
The most common issue is pasting the wrong keys. Make sure you are using the **Consumer Key** and **Secret Key** (OAuth 1.0 keys), **not** the OAuth 2.0 Client ID and Secret.
To fix this:
1. Go to [console.x.com](https://console.x.com/).
2. Click **Apps** in the sidebar and select your app.
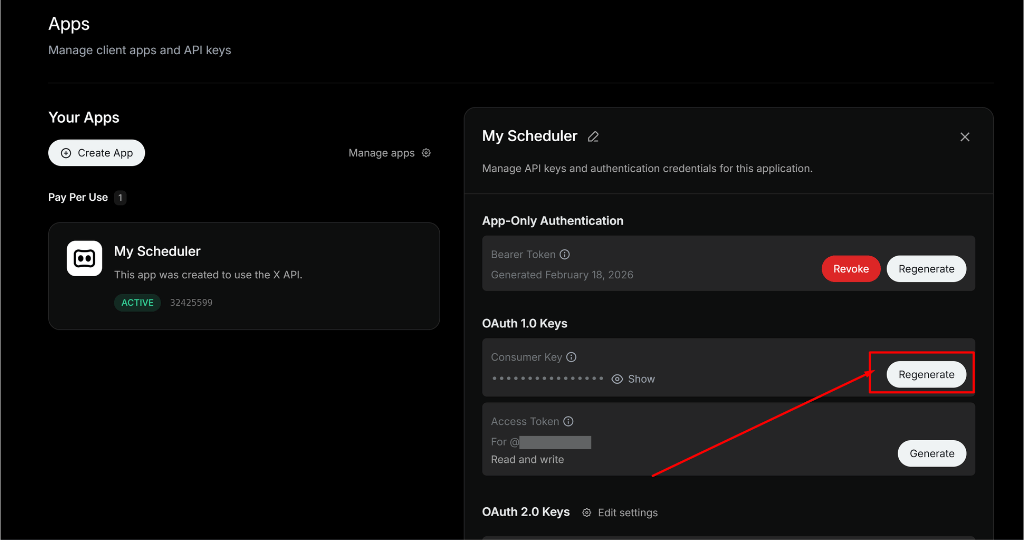
3. Under **OAuth 1.0 Keys**, click **Regenerate**.
4. Copy the new **Consumer Key** and **Secret Key**.
5. Update the keys in PaddyPost under **Settings** > **Services**.
## Step 6: Connect Your Account
Navigate to the **Accounts** page in the PaddyPost sidebar.
Click **Add Account** and select **X**.
You will be redirected to X (Twitter). Click **Authorize app** to grant PaddyPost permission to post on your behalf.
## Troubleshooting
The most common issue is pasting the wrong keys. Make sure you are using the **Consumer Key** and **Secret Key** (OAuth 1.0 keys), **not** the OAuth 2.0 Client ID and Secret.
To fix this:
1. Go to [console.x.com](https://console.x.com/).
2. Click **Apps** in the sidebar and select your app.
3. Under **OAuth 1.0 Keys**, click **Regenerate**.
4. Copy the new **Consumer Key** and **Secret Key**.
5. Update the keys in PaddyPost under **Settings** > **Services**.
 If you can connect your profile but posts are stuck in "Publishing", you have likely run out of X API credits.
Go to your [X Developer Console](https://console.x.com/) and add more credits. We recommend at least **\$5**, which gives you approximately **500 posts**.
This usually indicates a permission issue.
1. **Check App Permissions**: Ensure **Read and write** is selected in "User authentication settings".
2. **Regenerate Keys**: If you changed permissions *after* generating keys, you **must** regenerate the Consumer Key and Secret.
Ensure the **Callback URI** in X Developer Console matches exactly:
```
https://app.paddypost.com/paddypost/callback/twitter
```
Check for trailing spaces or missing `https://`.
If you can connect your profile but posts are stuck in "Publishing", you have likely run out of X API credits.
Go to your [X Developer Console](https://console.x.com/) and add more credits. We recommend at least **\$5**, which gives you approximately **500 posts**.
This usually indicates a permission issue.
1. **Check App Permissions**: Ensure **Read and write** is selected in "User authentication settings".
2. **Regenerate Keys**: If you changed permissions *after* generating keys, you **must** regenerate the Consumer Key and Secret.
Ensure the **Callback URI** in X Developer Console matches exactly:
```
https://app.paddypost.com/paddypost/callback/twitter
```
Check for trailing spaces or missing `https://`.